
Breakfast & Brunch
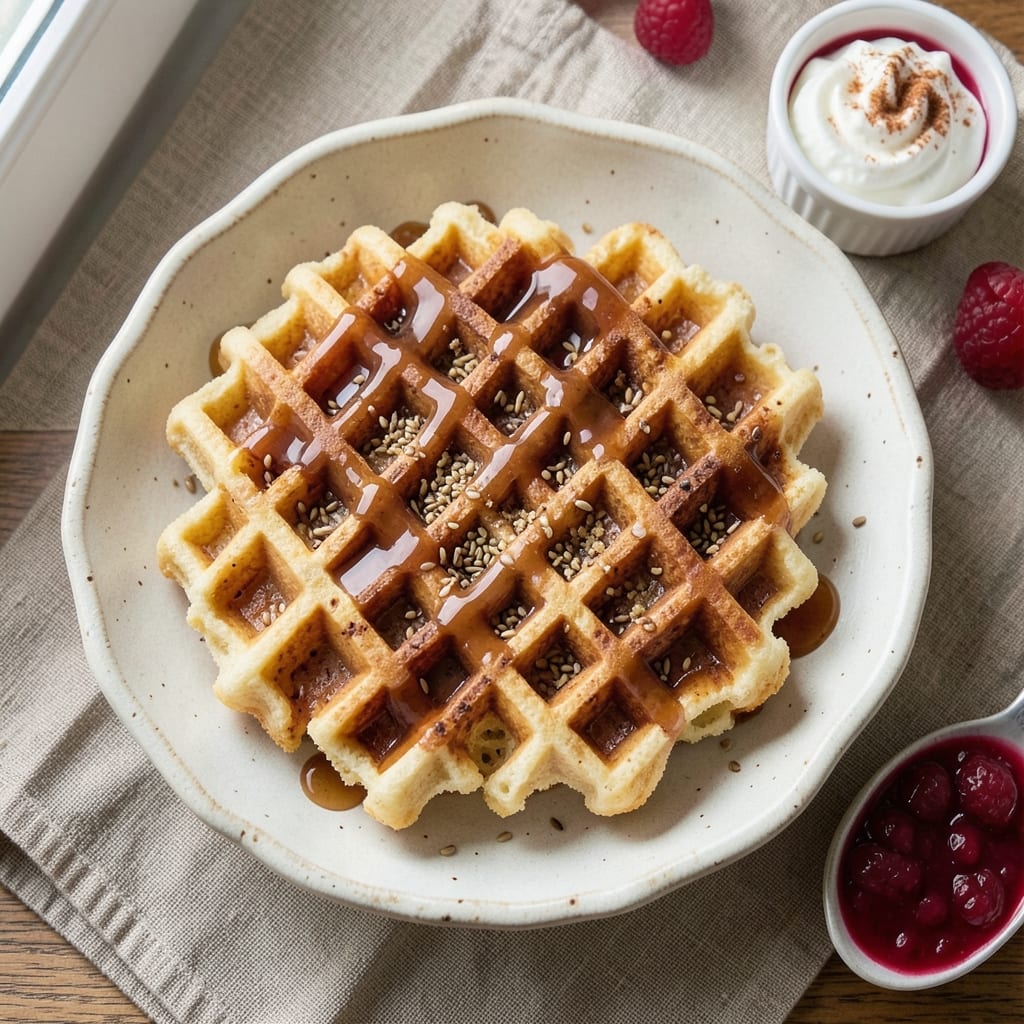
This dairy-free egg-free waffle recipe delivers crispy golden edges and fluffy interiors without dairy or eggs—proving plant-based breakfasts can be just as satisfying. The secret lies in a combination of aquafaba (chickpea brine) and flaxseed meal, which create the perfect texture while binding ingredients together. I've perfected this recipe through countless batches, ensuring it rises beautifully and stays crispy even after reheating.
The batter comes together in minutes with simple pantry staples: flour, baking powder, and a touch of apple cider vinegar for that signature tang. Unlike many vegan waffles that turn out dense, this recipe achieves restaurant-quality results with a light, airy crumb. The key is whipping the aquafaba to stiff peaks before folding it into the batter—this step makes all the difference in achieving that coveted fluffiness.
What you'll end up with is a stack of golden waffles with crispy edges that shatter slightly when you cut into them, revealing tender interiors. The flavor is neutral enough to pair with any topping—think fresh berries, maple syrup, or dairy-free whipped cream—yet hearty enough to stand alone. This recipe proves you don't need dairy or eggs to create waffles that rival your favorite brunch spot.
Perfect for weekend brunch, make-ahead breakfasts, or even a special treat. The batter can be prepped ahead and refrigerated, so you can cook fresh waffles whenever you're ready. Let's get started on creating your perfect stack!
Ingredients for dairy free egg free waffle
Simple pantry staples transform into restaurant-quality waffles—crispy edges, fluffy centers, zero dairy or eggs!
| Ingredient | Amount | Notes |
|---|---|---|
| All-Purpose Flour 🌾 | 2 cups | Sifted for light texture |
| Aquafaba 🥫 | ¾ cup | Chickpea brine, unsalted |
| Flaxseed Meal 🌰 | ¼ cup | Ground flaxseeds, golden or brown |
| Granulated Sugar 🍚 | ½ cup | Or coconut sugar for refined option |
| Baking Powder 🧂 | 2 tsp | Aluminum-free preferred |
| Salt 🧂 | ½ tsp | Fine sea salt |
| Apple Cider Vinegar 🍎 | 1 tbsp | For tangy flavor |
| Vanilla Extract 🌸 | 1 tsp | Pure vanilla preferred |
| Non-Dairy Milk 🥛 | ½ cup | Almond or oat milk works best |
| Coconut Oil 🥥 | ½ cup | Melted for greasing |
| Maple Syrup 🍁 | ¼ cup | For serving or optional mix-in |
The aquafaba is your secret weapon here—Trader Joe's sells canned chickpeas with brine, or save your own from canned beans. If you're using store-bought, make sure it's unsalted brine (no added salt). The flaxseed meal gives this batter its binding power, so Bob's Red Mill or any organic brand works perfectly. For the flour, King Arthur is my go-to—it's consistently light and reliable. The coconut oil needs to be melted but not hot—just warm enough to pour easily. And that apple cider vinegar? Don't skip it—it's what gives those waffles that signature tang!
No aquafaba? Silken tofu blended until smooth works in a pinch (use 0.5 cup), though texture might be slightly denser. Swap the coconut oil for vegan butter if you prefer (same amount), but it'll add richness. The maple syrup is optional for serving, but if you want to add it to the batter for flavor, reduce the non-dairy milk by 2 tbsp first. For a nutty twist, swap 0.25 cup of the flour for almond flour. And if you're short on vanilla, vanilla bean paste gives even more depth—just use half the amount since it's more concentrated.
Prep the batter ahead and store it in the fridge for up to 2 days—just give it a quick whisk before cooking. The waffles themselves reheat beautifully in a toaster or air fryer for 2-3 minutes at 350°F to restore crispiness. For make-ahead stacks, assemble with toppings and freeze between parchment paper for 1 month. Pro tip: Keep the coconut oil in a jar in the fridge so it's ready to melt in seconds when you're ready to cook!
Why You'll Love This Recipe
- No Special Skills Needed: I swear, you don’t need to be a baking pro—just mix, pour, and let the aquafaba do its magic. The flaxseed meal binds everything together while you’re scrolling through your phone waiting for the waffle iron to heat up.
- Crispy Without the Guilt: That golden-brown crust? Achieved with just a splash of aquafaba and a pinch of sugar—no butter, no eggs, no heavy cream. It’s the kind of crispy that makes you forget it’s secretly healthy.
- Breakfast, Dessert, Snack: Sweet or savory? Brunch or midnight craving? Toss these with berries and maple syrup, or top with avocado and hot sauce. They reheat like a dream, so I keep a batch frozen for lazy mornings.
- Pantry Staples Only: Honestly, you’re probably already stocked—flour, sugar, baking powder, and that chickpea brine (aquafaba) you’ve been saving. No weird ingredients, no last-minute grocery runs, just pure, reliable waffles for under $2 a batch.
Step-by-step instructions for fluffy dairy-free waffles
Here's how to make waffles that rival the best—crispy edges and airy centers, all without eggs or dairy.
Whisk Wet Ingredients for Maximum Fluff
In a large mixing bowl, combine the 0.75 cup aquafaba, 0.5 cup non-dairy milk, 1 tbsp apple cider vinegar, 1 tsp vanilla extract, and 0.5 cup melted coconut oil. Whisk vigorously for 3-4 minutes until the mixture thickens noticeably and forms soft peaks—this step replaces eggs entirely. You'll see the mixture go from thin to thick and frothy, almost like whipped cream. This is your secret to fluffy waffles!
I like to use a hand mixer for this—it's faster and creates more air. If you're using a whisk, your arm will get a workout! The aquafaba (chickpea brine) is the magic ingredient here, mimicking the binding and leavening properties of eggs perfectly. Don't skip the vinegar—it reacts with the baking powder to create lift, just like buttermilk would in traditional recipes.
Mix Dry Ingredients for Perfect Texture
In a separate bowl, sift together the 2 cups all-purpose flour, 0.5 cup granulated sugar, 2 tsp baking powder, and 0.5 tsp salt. This sifting step is crucial—it prevents dense waffles by ensuring even distribution of ingredients and removing lumps. Add the 0.25 cup flaxseed meal to the dry ingredients and mix gently with a spatula.
Now, gradually pour the dry ingredients into the wet mixture while folding gently with a spatula. You're looking for a smooth, thick batter that coats the back of the spoon but still flows easily. Overmixing here will develop gluten and make your waffles tough, so mix just until combined. The batter should be slightly thicker than pancake batter—almost like heavy cream. If it looks too thick, add 1-2 tablespoons of non-dairy milk to loosen it.
Preheat and Grease Your Waffle Iron
Preheat your waffle iron to 375°F—this high heat is essential for achieving those crispy edges while keeping the interior fluffy. While it's heating, brush the plates with melted coconut oil using a pastry brush, making sure to coat both sides thoroughly. The oil prevents sticking and adds to that golden-brown crust. I find that coconut oil gives a nice flavor too, but you could use vegetable oil if preferred.
Here's the thing—don't skip the greasing step. Even with this dairy-free batter, waffles can stick if the iron isn't properly oiled. For extra insurance, you can lightly spray the plates with non-stick cooking spray after adding the oil. The combination gives you the best of both worlds: flavor from the coconut oil and non-stick properties from the spray.
Cook Waffles to Golden Perfection
Pour about ½ cup of batter onto the center of the preheated waffle iron, spreading it evenly to the edges. Close the lid and cook for 4-5 minutes, or until the waffles are deep golden brown and the indicator light turns off. You'll know they're ready when you see crispy edges and hear a hollow sound when you tap them gently with a spatula.
Don't be tempted to open the iron early to check—this releases steam and can make your waffles gummy. The first waffle might take slightly longer as the iron heats up, but subsequent ones should be consistent. For even cooking, I like to rotate the iron 180 degrees halfway through cooking if my iron doesn't have automatic flipping. This ensures both sides get equal heat exposure.
Serve Warm with Maple Syrup
Transfer the cooked waffles to a wire rack and let them cool for 2-3 minutes—this prevents them from getting soggy if you stack them. For serving, I like to drizzle with the 0.25 cup maple syrup while still warm. The syrup soaks into the crispy edges, creating a perfect balance of textures and flavors.
These waffles are best served immediately, but if you need to reheat, pop them in a 350°F oven for 5-7 minutes to restore that crispy texture. The secret to their success lies in that perfect balance of crispy edges and fluffy centers—something that's often hard to achieve in dairy-free baking. Trust the process, and you'll have waffles that everyone will ask for, dairy-free or not!
Pro Tips For Making Dairy Free Egg Free Waffle
- Whisk Aquafaba First: I learned this the hard way—skip this step, and your waffles turn out dense. Beat the aquafaba alone for 3-4 minutes until frothy before adding anything else. That extra air is what makes these waffles light, not eggy.
- Measure Flaxseed Meal Precisely: Flaxseed meal is finicky—pack it into the measuring cup and level it off. Too much, and your waffles get gummy; too little, and they’ll crumble. A kitchen scale takes the guesswork out entirely.
- Preheat Iron to Medium-High: Low heat = soggy waffles. Medium-high gives you a crisp exterior while keeping the inside tender. Test with a drop of water—it should sizzle immediately. (Yes, even if your recipe says "medium.")
- Fold in Flour Gently: Dump all the flour in at once, and you’ll kill the aquafaba’s bubbles. Sift half, whisk it in, then fold in the rest with a spatula—just until combined. Overmixing = tough waffles.
Best sauces and condiments for these flavors
Maple-Glazed Magic
Start with pure maple syrup—I recommend Grade A Dark Amber for its rich, caramel notes that complement the waffles' crispy edges. Warm ¼ cup gently in a small saucepan over low heat until it reaches 160°F, then brush it onto warm waffles using a pastry brush. For extra decadence, add ½ tsp vanilla extract to the warm syrup before brushing. This creates a glossy finish that caramelizes slightly when the waffles cool. 🍁
Berry Bliss Compote
Simmer 1 cup mixed berries (fresh or frozen) with 2 tbsp maple syrup and 1 tsp lemon juice for 5 minutes until thickened. Mash lightly with a fork for texture, then chill until serving. The berries' natural acidity cuts through the waffles' richness, while their juices soak into the crispy edges. I love using blackberries and raspberries for their bold flavors, but strawberries work beautifully too. Store compote in an airtight container for up to 3 days.
Nutty Almond Butter Swirl
Mix 2 tbsp almond butter with 1 tsp maple syrup and a pinch of sea salt until smooth. Spread a thin layer on cooked waffles, then swirl with a knife for a marbled effect. The nutty depth pairs perfectly with the waffles' fluffiness, and the salt enhances all flavors. For a peanut butter alternative, use creamy peanut butter—just add an extra ½ tsp cinnamon for warmth. Keep the mixture refrigerated between uses. 🥜
Coconut Whipped Cream
Whip ½ cup full-fat coconut cream (chilled overnight) with 1 tbsp powdered sugar and ½ tsp vanilla extract until stiff peaks form. Dollop onto waffles for a light, airy contrast to the crispy texture. For extra flair, toast ½ tsp coconut flakes in a dry pan over medium heat for 1 minute, then sprinkle over the whipped cream. The coconut's tropical notes complement the waffles' neutral base beautifully. Store whipped cream in an airtight container for up to 2 days.
Spiced Caramel Drizzle
Combine ¼ cup maple syrup, 1 tbsp coconut oil, 1 tsp cinnamon, and a pinch of sea salt in a saucepan. Heat over medium-low until melted, then simmer for 3 minutes until slightly thickened. Drizzle over waffles while warm for a sweet-spicy contrast. This sauce is versatile—use it on pancakes or even ice cream! Store in a small jar in the fridge for up to 1 week. ✨
Chocolate Ganache Dip
Melt ½ cup dairy-free dark chocolate chips (I love Enjoy Life brand) with 2 tbsp coconut cream over a double boiler. Stir until smooth, then let cool slightly before dipping waffles. The chocolate's bitterness balances the waffles' sweetness, creating a sophisticated pairing. For a nutty twist, add 1 tbsp chopped walnuts to the ganache before it sets. Keep ganache in an airtight container for up to 5 days.
Nutrition facts
Frequently asked questions
Why does this recipe use aquafaba instead of eggs?
Aquafaba (chickpea brine) acts as the perfect egg substitute here—its protein content helps bind ingredients while creating air when whipped, just like eggs do. The 3-4 minute whipping creates stiff peaks that give these waffles their signature fluffiness without any dairy or eggs. Plus, it's a zero-waste ingredient if you save the brine from canned chickpeas!
Can I make these waffles without a waffle iron?
Yes! Use a non-stick skillet over medium heat with ¼ cup oil per batch. Pour ¼ cup batter per circle, cook 3-4 minutes per side until golden. They won't have the classic waffle shape but will still be crispy and fluffy inside. For extra crispiness, finish under a broiler for 1 minute after flipping.
How do I store leftover waffles to keep them crispy?
Cool completely, then stack between parchment paper and store in an airtight container at room temp for 2 days. For longer storage, freeze between parchment for 1 month. To reheat, toast in a toaster for 2-3 minutes at 350°F or air fry at 375°F for 3 minutes—this restores that perfect crispy texture!
What's the best dairy-free milk to use?
Oat milk or almond milk work best—they're neutral in flavor and provide the right creaminess. Avoid soy milk (can make batter too dense) and coconut milk (adds too much richness). For extra fluffiness, use unsweetened versions. If your batter seems too thick, add 1 tbsp more milk at a time until it reaches pancake-batter consistency.
Can I make these gluten-free?
Swap the all-purpose flour for a 1:1 gluten-free baking flour blend (like Bob's Red Mill). You may need to add ½ tsp xanthan gum to improve binding. For best results, let the batter rest 10 minutes before cooking—this helps the blend hydrate properly. Expect slightly denser waffles, but they'll still be delicious with crispy edges!