
Breakfast & Brunch
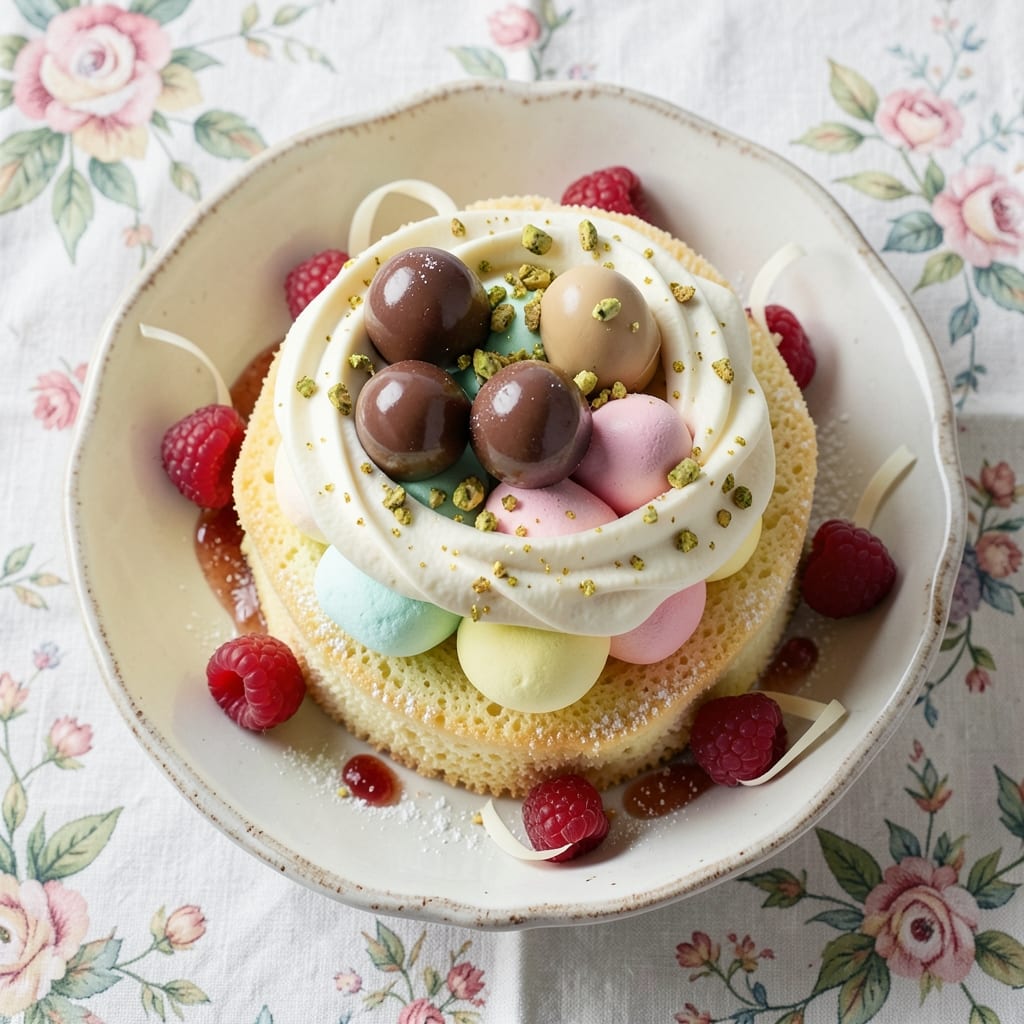
This Easter egg nest cakes recipe transforms breakfast into a celebration with pastel layers and hidden chocolate surprises. The secret lies in light, fluffy cake batter that bakes into delicate layers, perfectly supporting the weight of candy eggs and frosting. I developed this recipe after years of baking for Easter brunches—it’s the one that finally earned me compliments from even the pickiest guests.
The magic happens in the assembly: each layer gets filled with vanilla buttercream before stacking, creating a sturdy base for the nest presentation. Chocolate eggs nestle between layers, peeking out like treasures waiting to be discovered. The pastel frosting adds that festive touch without overpowering the cake’s natural sweetness.
What you’ll end up with is a showstopping dessert that’s as delicious as it is beautiful—each bite reveals layers of cake, creamy frosting, and a surprise chocolate egg. The texture is perfectly balanced: tender cake, smooth frosting, and just enough crunch from the candy eggs.
This recipe is ideal for Easter brunches, spring celebrations, or anytime you want to add a touch of whimsy to your table. The steps are straightforward, but the result feels special enough for any occasion. Let’s get baking!
Ingredients for easter egg nest cakes
Twelve ingredients for pastel-perfect Easter magic that’ll wow your guests.
| Ingredient | Amount | Notes |
|---|---|---|
| All-Purpose Flour 🌾 | 3 cups | Sifted for light texture |
| Granulated Sugar 🍚 | 2 cups | Superfine preferred for smoothness |
| Unsalted Butter 🧈 | 1 ½ cups | Room temperature, full-fat |
| Large Eggs 🥚 | 6 whole | Room temperature for blending |
| Vanilla Extract 🌸 | 2 tsp | Pure extract, not imitation |
| Baking Powder 🍞 | 1 ½ tsp | Freshly measured |
| Fine Sea Salt 🧂 | ½ tsp | Diamond Crystal preferred |
| Milk 🥛 | 1 cup | Whole milk for richness |
| Pastel Food Coloring 🎨 | 1 tsp | Divided for layer colors |
| Vanilla Buttercream Frosting 🍰 | 2 ½ cups | Homemade or quality store-bought |
| Chocolate Eggs 🍫 | 12 whole | Mini eggs, 1.5 oz each |
| Springflower Decorations 🌸 | ¼ cup | Edible flowers or sprinkles |
The flour and butter are your foundation—King Arthur flour for the best rise and Plugrá butter for that tender crumb. I always grab the superfine sugar at Trader Joe's for silky layers, but regular granulated works in a pinch. The eggs? Room temperature is non-negotiable—crack them into a bowl first, let them sit 10 minutes. For the pastel colors, Wilton gel food coloring (the good stuff) blends perfectly without altering the texture. If you're using store-bought frosting, Betty Crocker's vanilla buttercream is my go-to—it's stable enough for stacking without melting.
No vanilla extract? Almond extract at half the amount works, but the flavor's different. Short on butter? Coconut oil can replace up to half, but the cake won't be as rich. For the chocolate eggs, Ghirardelli mini eggs are my favorite—they melt beautifully when baked between layers. If you can't find them, Cadbury mini eggs work too. The springflower decorations? Wilton's edible flowers are pricey but stunning—sugar pearls from the same brand are a budget-friendly alternative. Pro tip: Taste your batter before baking—adjust sweetness with an extra tablespoon of sugar if needed.
Store cake layers in an airtight container between parchment-lined plates for up to 3 days—they actually improve overnight. The frosting? Keep it in the fridge until ready to assemble, then let it sit at room temperature for 10 minutes before piping. For make-ahead magic, bake the layers 2 days ahead, freeze them, then thaw at room temperature before assembling. The finished cake? Room temperature is best for serving—it keeps the frosting perfect for 4-5 hours, though I've never had one last that long!
Why You'll Love This Recipe
- No Mixer Needed: I swear by this recipe because it’s all about the creaming—just butter and sugar, mashed together until fluffy. No electric mixer, no fuss, just elbow grease (or a sturdy wooden spoon) that gets the job done in minutes.
- Vanilla Buttercream Magic: That rich, buttery frosting with just a whisper of vanilla? It’s the kind of sweetness that makes you pause mid-bite. Honestly, the eggs in the batter give it this unexpected depth—like a hug for your taste buds.
- Show-Stop Showcase: Between us, these cakes look way more impressive than they are. The egg-shaped nests stacked with dyed marshmallows or sprinkles? Instant holiday wow factor. Perfect for Easter brunch, birthday parties, or just because you deserve a little celebration.
- Budget-Friendly Batch: Flour, sugar, butter—these are pantry staples that won’t break the bank. I’ve made two dozen of these for under $15, and they disappear faster than my willpower during a sale. Plus, leftovers? They last days if you can resist them.
Step-by-step instructions for Easter egg nest cakes
Here's how to create these pastel-perfect stacks with hidden chocolate surprises.
Prepare the Cake Layers
Preheat your oven to 350°F and grease three 6-inch round cake pans. Sift together the 3 cups all-purpose flour, 1.5 teaspoons baking powder, and 0.5 teaspoon fine sea salt in a medium bowl. Set aside - this dry mix is your foundation.
In a separate large bowl, cream together the 1.5 cups unsalted butter and 2 cups granulated sugar using an electric mixer on medium speed for 3-4 minutes until light and fluffy. This step is crucial for achieving that tender, moist texture we want. Add the 6 whole large eggs, one at a time, mixing well after each addition. Incorporate the 2 teaspoons vanilla extract and the 1 cup milk next, mixing until just combined.
Gradually add the dry ingredients to the wet mixture, mixing on low speed until just combined. Divide the batter evenly among the three prepared pans. For the pastel effect, divide the 1 teaspoon pastel food coloring between the three layers - I like to use light pink, mint green, and baby blue for a classic Easter look. Bake for 25-30 minutes or until a toothpick inserted into the center comes out clean. Allow the cakes to cool in the pans for 10 minutes before transferring to a wire rack to cool completely.
Create the Hidden Chocolate Surprise
While the cakes are cooling, prepare the chocolate surprise layer. Place the 12 whole chocolate eggs in a single layer on a parchment-lined baking sheet. Melt 1 tablespoon unsalted butter (from the remaining butter if you've used most) and brush it lightly over each chocolate egg. This helps them stick together when stacked.
Arrange the chocolate eggs in a single layer on a small plate or cake stand. For a more dramatic effect, you can create a pyramid shape with the eggs, placing the largest ones at the bottom and working your way up to the smaller ones. This will create a beautiful nest effect when we add the cake layers.
Assemble the Easter Egg Nest Cakes
Once all layers are completely cool, it's time to assemble. Place the first cake layer on a cake stand or plate. Spread a thin layer of vanilla buttercream frosting (about 1/4 cup) over the top, leaving a small border around the edges. This will help the layers adhere without making the cake too thick.
Gently place the chocolate egg nest on top of the frosted layer, arranging the eggs in a way that creates an attractive pattern. I like to create a circular arrangement with the eggs pointing outward. Add the second cake layer on top, again spreading a thin layer of frosting. Repeat with the third cake layer, spreading frosting and placing it on top.
Frost and Decorate
Once all cake layers are stacked, it's time to create the final presentation. Spread a generous layer of the remaining 2 cups vanilla buttercream frosting over the entire cake, using an offset spatula to create smooth sides. For a more professional look, you can use a cake scraper to create clean edges.
To create the nest effect, gently press the 0.25 cup springflower decorations around the base of the cake, arranging them to resemble nest materials. You can also add a few extra decorations on top of the cake for a whimsical touch. For additional color accents, pipe small rosettes or swirls of colored buttercream around the edges using pastel-colored frosting.
Final Touches and Serving
The final step is to let the frosting set for 30 minutes at room temperature before serving. This allows the cake to hold its shape and makes slicing easier. When ready to serve, use a serrated knife to cut through the layers, being careful not to disturb the chocolate egg nest too much.
Each slice will reveal the hidden chocolate eggs nestled within the pastel layers, creating a delightful surprise for your guests. Serve immediately to enjoy the cake at its best texture and flavor. These cakes are perfect for Easter celebrations and will surely impress your guests with their beautiful presentation and delicious taste.
Pro Tips For Making Easter Egg Nest Cakes
- Chill the Dough First: Mixing the batter for these nests is easier when the butter’s soft but not greasy—press it into the flour with cold hands (yes, even if you’re impatient like me). The dough will hold together better when you shape those little nests, and you’ll avoid a greasy mess that sticks to your fingers.
- Weigh the Sugar: Granulated sugar can pack differently, and this recipe’s delicate structure relies on precise measurements. Use a kitchen scale for the sugar—1 cup isn’t always 200g, and that tiny variance makes a difference in how the nests bake.
- Don’t Overmix the Eggs: Whisk the eggs and vanilla just until combined—no streaks, but no froth either. Overworking them adds air that collapses during baking, leaving flat, dense nests. Think "lightly blended," not "meringue-like."
- Bake in Rounds: Instead of cramming the nests onto one tray, bake them in batches of 12–15 at a time. Crowding steams them instead of browning, and you’ll end up with soggy bottoms. Rotate the tray halfway through for even color—no one wants pale, undercooked nests.
Perfect pairings for these flavors
Spring Brunch Sides
Serve your Easter egg nest cakes with a fresh strawberry shortcake—the tart berries cut through the sweetness beautifully. I like to make mini versions using the same cake batter and top with whipped cream and sliced strawberries. For a savory contrast, try herbed goat cheese crostini with honey drizzle on the side—it balances the richness of the frosting. 🌸
Hot Beverage Pairings
A vanilla chai latte from Starbucks complements the cake’s sweetness without overpowering it. The warm spices like cinnamon and cardamom enhance the vanilla notes in the frosting. For a non-coffee option, Earl Grey tea with a splash of milk adds a floral, bergamot aroma that pairs wonderfully with the pastel layers. ☕
Creamy Dessert Additions
Add a scoop of vanilla bean ice cream from Ben & Jerry’s on the side for guests who love extra creaminess. The cold temperature also helps reset your palate between bites. For a lighter option, serve lemon curd tarts—the tangy citrus brightens the rich cake and frosting. 🍦
Seasonal Garnishes
Sprinkle edible gold leaf over the finished cake for a luxurious touch that’s perfect for Easter celebrations. I also love adding fresh mint leaves around the base for a pop of color and a refreshing aroma. For a playful touch, rainbow sprinkles around the edges add a fun, whimsical vibe. ✨
Kid-Friendly Serving Ideas
Cut the cake into small, individual portions and serve on colorful Easter plates for a fun presentation. Add a mini chocolate bunny on top of each slice to make it feel like a special treat. For extra excitement, let kids assemble their own mini nests with mini marshmallows and sprinkles as a fun activity. 🐰
Nutrition facts
Frequently asked questions
Can I make these Easter egg nest cakes without a cake stand?
Use a large dinner plate or even a decorative cake board as your base. For extra stability, place a small plate or cake ring in the center before adding the first layer. This creates a raised platform that keeps the chocolate eggs from sliding off during assembly.
How do I prevent the cake layers from crumbling when stacking?
Chill the cake layers in the fridge for 20-30 minutes before assembling to firm them up. Use a thin layer of frosting (about 1/4 cup) between each layer, and press gently but firmly. For extra support, brush the top of each layer with a simple syrup (equal parts sugar and water, heated until dissolved) before adding frosting.
What if I don't have mini chocolate eggs?
No problem! Use 1-inch chocolate truffles or even caramel-filled chocolates instead. For a budget-friendly option, make your own mini eggs by melting chocolate, pouring into silicone molds, and chilling. The key is to keep them similar in size to maintain the nest effect.
Can I make this recipe gluten-free or dairy-free?
Yes, but with adjustments. For gluten-free, use a 1:1 gluten-free flour blend and add 1/4 cup extra flour to the dry ingredients. For dairy-free, substitute the butter with vegan butter and use dairy-free milk. The texture may be slightly denser, so expect slightly shorter bake times.
How far ahead can I prepare the cake layers?
You can bake the cake layers up to 2 days ahead and store them in an airtight container at room temperature. For longer storage, freeze the layers (unfrosted) for up to 1 month. Thaw completely before assembling. The frosting should be made fresh day-of to maintain its perfect consistency.