
Breakfast & Brunch
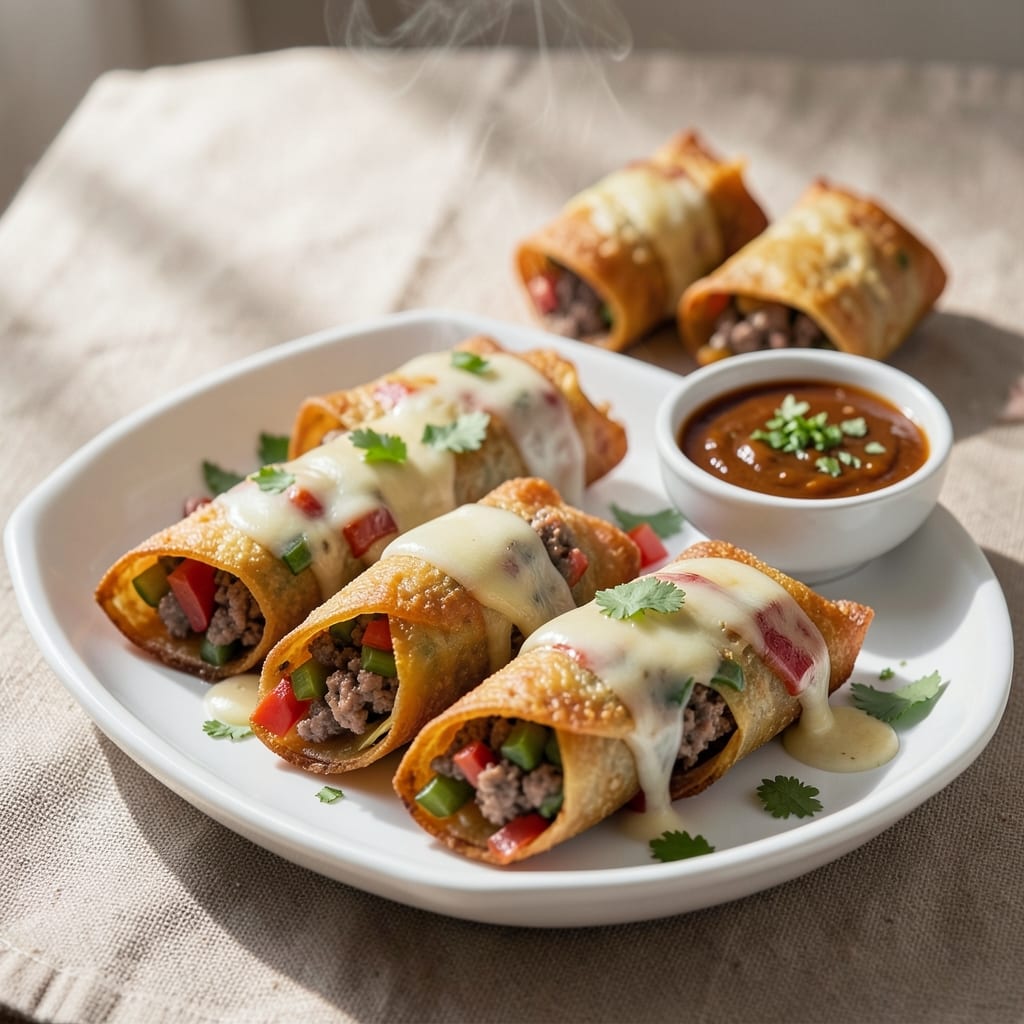
This crispy taco egg rolls recipe transforms breakfast into a crunchy, savory experience that rivals your favorite takeout. The secret lies in a perfectly seasoned filling—juicy ground beef, melted cheese, and diced veggies—wrapped in golden-brown wonton shells that stay crispy even after serving. I’ve tested this recipe countless times to ensure the exterior is shatteringly crisp while the inside remains tender and packed with flavor.
What sets these apart is the two-step frying technique: first, a quick sear in oil to lock in crispiness, then a final crisp in the oven for even browning. The filling is a spiced scramble of ground beef, taco seasoning, and cheese, giving each bite a bold, cheesy, and slightly tangy kick. This isn’t just breakfast—it’s a restaurant-quality handheld meal that’s perfect for brunch, game day, or a quick snack.
The result is a dish that’s impossible to resist: crispy on the outside, creamy and flavorful on the inside, with that satisfying crunch that keeps you reaching for another bite. Serve with classic taco toppings like sour cream, salsa, or guacamole for the full experience. The best part? These egg rolls reheat beautifully, making them ideal for meal prep.
Whether you’re feeding a crowd or craving a solo snack, this recipe delivers foolproof results every time. Let’s get started—your taste buds will thank you.
Ingredients for crispy taco egg rolls
Pantry staples meet restaurant-style crunch in these crispy taco egg rolls.
| Ingredient | Amount | Notes |
|---|---|---|
| Wonton Wrappers 🥟 | 24 pieces | Square, standard size |
| Ground Beef (80/20) 🥩 | 1 ½ lb | Lean-to-fat ratio for juiciness |
| Shredded Monterey Jack Cheese 🧀 | 1 ½ cups | Mild, melts beautifully |
| Taco Seasoning 🌶️ | 2 tbsp | Homemade or quality packet |
| Large Eggs 🥚 | 3 whole | Room temperature for even scramble |
| Diced Bell Peppers (Red/Green) 🌶️ | 1 cup | Fresh, finely chopped |
| Finely Chopped Onion 🧅 | ½ cup | Yellow or white preferred |
| Vegetable Oil 🫒 | 2 cups | High smoke point for frying |
| All-Purpose Flour 🌾 | ¼ cup | For dusting wonton shells |
| Salt 🧂 | 1 tsp | Kosher or sea salt preferred |
| Black Pepper 🌶️ | ½ tsp | Freshly ground for best flavor |
| Cornstarch 🌾 | 2 tbsp | For extra crispiness |
| Sour Cream 🥛 | ½ cup | For serving (optional) |
| Salsa 🍅 | 1 cup | Medium heat preferred |
The wonton wrappers are non-negotiable for that signature crispiness—King Noodle brand is my go-to, but any standard wonton wrapper works. Grab a pack from the Asian aisle at Walmart or Target, or order online if your local store doesn't carry them. The 80/20 ground beef is key for juiciness; leaner cuts dry out during the two-step frying. For the cheese, Monterey Jack melts smoothly without turning rubbery, but cheddar or a blend works too. Pre-shredded cheese has anti-caking agents that can make the filling gummy, so grab a block and shred it yourself.
No taco seasoning packet? Mix 1 tbsp chili powder, 1 tsp cumin, 1 tsp paprika, ½ tsp garlic powder, ½ tsp onion powder, ¼ tsp cayenne for a homemade version. Swapping out the bell peppers? Zucchini or mushrooms work well—just dice them small for even cooking. The eggs should be room temperature for a silky scramble; crack them into a bowl first, then stir. For extra crispiness, toss the filled wontons in cornstarch instead of flour before frying. And if you're short on time, pre-cooked ground beef from the deli section saves steps—just drain it well.
These reheat beautifully—350°F for 10-12 minutes until crispy again. Store leftovers in an airtight container for 3 days, or freeze for up to 2 months by stacking them with parchment between layers. For serving, I always keep sour cream, salsa, and sliced jalapeños ready—drizzle the sour cream on top right before eating so it doesn’t get soggy. Double the batch and freeze half; they’re perfect for game day or a quick snack when cravings hit.
Why You'll Love This Recipe
- 20-Minute Wonder: I swear, the only prep is browning the beef and cracking eggs—no chopping, no fuss. Just season, fold, fry, and boom: golden bites in under 20 minutes.
- Cheesy Crispy Magic: That Monterey Jack melts into gooey perfection while the wonton wrappers stay shockingly crispy. Honestly, the contrast of salty, cheesy, and slightly charred edges? It’s my new favorite handheld snack.
- Party or Pantry: Between us, these disappear at game days, potlucks, or whenever I’m too tired to cook. Freeze extras for lazy nights—just reheat and they’re still crispy. (Yes, even on a Tuesday night.)
- Budget Hack: Ground beef and wonton wrappers stretch this recipe for a crowd, and the eggs add protein without breaking the bank. My wallet and my family thank me every time.
Step-by-step instructions for crispy taco egg rolls
Here's how to make golden, shatteringly crispy egg rolls with a perfect spiced scramble inside.
Prepare the Filling with Perfect Texture
In a large skillet over medium-high heat, cook the 1.5 lb ground beef (80/20) until it reaches 160°F internally, breaking it into fine crumbles. You'll see the fat render out and sizzle—this is where all the flavor develops. Drain any excess fat that accumulates, leaving about 1 tablespoon for cooking.
Add the 0.5 cup finely chopped onion and 1 cup diced bell peppers, cooking for 4-5 minutes until softened but still vibrant. Stir in the 2 tbsp taco seasoning, 1 tsp salt, and 0.5 tsp black pepper, letting it bloom for 1 minute to wake up all those spices. This step ensures your filling has maximum flavor without drying out.
In a separate bowl, whisk together the 3 whole large eggs until frothy. Pour them into the skillet and stir constantly with a silicone spatula for 2-3 minutes until just set but still slightly moist—you want a custard-like texture, not scrambled eggs. Remove from heat immediately to prevent overcooking.
Combine Filling with Cheese and Cornstarch
Transfer the egg mixture to a large mixing bowl and stir in the 1.5 cups shredded Monterey Jack cheese until fully melted and evenly distributed. Sprinkle the 2 tbsp cornstarch over the top and gently fold it in with a rubber spatula. The cornstarch creates that signature crunchy texture when fried.
Let the filling cool completely to room temperature before assembling the egg rolls. This prevents the wonton wrappers from becoming soggy when you fry them later. If you're short on time, spread the filling on a baking sheet and refrigerate for 15 minutes while you prepare the frying setup.
Set Up for Deep Frying
Fill a deep skillet or Dutch oven with 2 cups vegetable oil and heat it over medium heat until it reaches 350°F. Use a deep-fry thermometer to monitor the temperature—this is critical for even cooking and crispiness. If you don't have one, test with a small piece of wonton wrapper: it should sizzle vigorously and float within 10 seconds.
While the oil heats, place the 24 wonton wrappers on a clean work surface. Dust each wrapper lightly with the 0.25 cup all-purpose flour on both sides, shaking off any excess. This creates a barrier that helps the filling stick and prevents the wrappers from sticking to each other.
Assemble and Fry to Golden Perfection
Place 1 tablespoon of filling in the center of each wonton wrapper. Fold the wrapper diagonally to form a triangle, then fold the sides inward and press firmly to seal. You'll want a tight seal to prevent filling from leaking during frying. Place the assembled egg rolls seam-side down on a wire rack.
Working in batches of 4-5 egg rolls at a time, carefully lower them into the 350°F oil using a slotted spoon or spider strainer. Fry for 2-3 minutes until they turn a deep golden brown color. You'll see bubbles form around the edges—that's your signal they're cooking through. Use tongs to turn them occasionally for even browning.
Serve with Classic Dipping Sauces
Transfer the fried egg rolls to a paper towel-lined plate to drain any excess oil. They'll stay crispy for about 5 minutes, so serve immediately. For the ultimate presentation, arrange them on a platter with the 0.5 cup sour cream and 1 cup salsa on the side. The contrast of cool sour cream and tangy salsa with the hot, crispy egg rolls is what makes this dish so addictive.
Cut each egg roll in half to reveal that perfect golden crust and creamy, spiced filling inside. The secret to maintaining crispiness is serving them right away—don't let them sit too long or they'll soften. Enjoy with extra salsa or a sprinkle of chopped cilantro for a fresh finish.
Pro Tips For Making Crispy Taco Egg Rolls
- Preheat Pan Properly: Get that skillet screaming hot—medium-high to high—before adding the egg rolls. I used to rush this and ended up with soggy wrappers instead of crispy edges. A hot pan seals the deal for that golden crust.
- Drain Beef Well: After cooking the ground beef, spread it on a paper towel and let it sit for 3-5 minutes. The extra moisture in seasoned beef makes the filling too wet, and that’s how you end up with sad, limp egg rolls.
- Skip the Overfilling: One wrapper, one heaping tablespoon of filling max. I learned this after making a batch where the wrappers split open—now I measure carefully, and the rolls stay intact while frying.
- Egg Wash Lightly: Brush the egg wash on just the edges of the wrappers before sealing. Too much egg makes the filling steam instead of crisp, and suddenly you’ve got a chewy mess instead of a crunchy bite. A light coat does the trick.
Pro cooking tips for great crispy taco egg rolls
Oil Temperature Control
Nailing the oil temperature is the single most important factor for crispy egg rolls. I can’t stress this enough: maintain a steady 350°F using a deep-fry thermometer—instant-read thermometers don’t work here. If the oil is too hot (375°F+), your wrappers will burn before the filling cooks through. Too cool (325°F), and they’ll turn greasy. Test with a scrap of wonton wrapper—it should sizzle and float within 10 seconds. 🌡️
Two-Stage Frying
For restaurant-quality results, I use a two-stage frying method. First, fry the assembled egg rolls at 350°F for 2 minutes to set the exterior. Then transfer them to a baking sheet and finish in a 400°F oven for 5-7 minutes—this creates a deeper golden color and extra crispiness. The oven step also helps cook the filling more evenly without over-frying the wrappers.
Sealing the Wrappers
Properly sealing the wrappers prevents filling leaks and ensures even cooking. After placing 1 tbsp filling in each wrapper, fold the sides inward and press firmly with your fingers. For extra security, I dip the folded edges in a little water before sealing—this creates a stronger bond. If filling leaks during frying, wipe it off immediately with a paper towel to keep the oil clean and prevent flare-ups.
Batch Size Matters
Overcrowding the oil lowers its temperature and steams the wrappers instead of frying them. Work in batches of 4-5 egg rolls at a time, giving them space to cook without touching. Use a slotted spoon or spider strainer to carefully lower and remove them. If you’re making a big batch, keep the oil at 350°F between batches—adding cold egg rolls will drop the temperature significantly.
Cornstarch Secret
The 2 tbsp cornstarch in the filling is non-negotiable for that signature crunch. It creates a crispy, almost powdery texture when fried. Mix it thoroughly into the filling before assembling the wrappers—don’t just sprinkle it on top. For even more crispiness, toss the assembled egg rolls in cornstarch (instead of flour) before frying. This extra layer adds an audible crunch that’ll have everyone reaching for seconds. 💫
Reheating Like a Pro
Store leftovers in an airtight container, but reheat them properly to restore crispiness. I recommend 350°F for 10-12 minutes on a baking sheet lined with parchment paper. For extra crunch, broil for 1-2 minutes at the end. Microwaving kills crispiness—never do it! If you’re short on time, a hot air fryer at 375°F for 5 minutes** works too. Always reheat until the exterior is golden again.
Nutrition facts
Frequently asked questions
Can I use tortillas instead of wonton wrappers for these egg rolls?
While tortillas might seem like a quick substitute, they won't give you that signature crispy texture. Wonton wrappers are specifically designed to become shatteringly crisp when fried. If you're set on tortillas, try using small flour tortillas (about 6-inch size) and brush them lightly with oil before folding. However, expect a softer result—these won't be as crispy as traditional wonton-wrapped egg rolls.
How do I prevent the filling from leaking out during frying?
Proper sealing is key! After placing the filling, fold the wrapper diagonally into a triangle, then fold the sides inward and press firmly with your fingers. For extra security, dip the folded edges in a little water before sealing completely. This creates a stronger bond. Also, don't overfill—use 1 tablespoon of filling per wrapper maximum. If leaks happen during frying, wipe them off immediately with a paper towel to keep the oil clean.
Can I make these egg rolls ahead of time?
Assemble the egg rolls (unfried) and store them in an airtight container in the fridge for up to 24 hours. For longer storage, freeze them on a baking sheet before transferring to a freezer bag (they'll keep for 2 months). To cook from frozen, fry at 350°F for 3-4 minutes until golden. For reheating cooked egg rolls, bake at 350°F for 10-12 minutes on parchment paper to restore crispiness. Never microwave!
What's the best way to make them healthier?
For a lighter version, try air-frying instead of deep-frying: coat assembled egg rolls in egg wash + cornstarch and air-fry at 375°F for 8-10 minutes, flipping halfway. Use lean ground turkey instead of beef, and swap half the cheese for low-fat cottage cheese blended into the filling. You can also bake them at 400°F for 15-18 minutes on a wire rack for a crispy exterior with less oil.
Why did my egg rolls turn out greasy instead of crispy?
Greasy egg rolls usually mean one of three things: your oil wasn't hot enough (350°F is critical), you overcrowded the pan (work in batches of 4-5 at a time), or the wrappers weren't dry before frying. Always use a thermometer to check oil temp, and pat dried wrappers with a paper towel before assembling. If they cool too long after frying, they'll absorb oil—serve immediately for maximum crispiness!