
Breakfast & Brunch
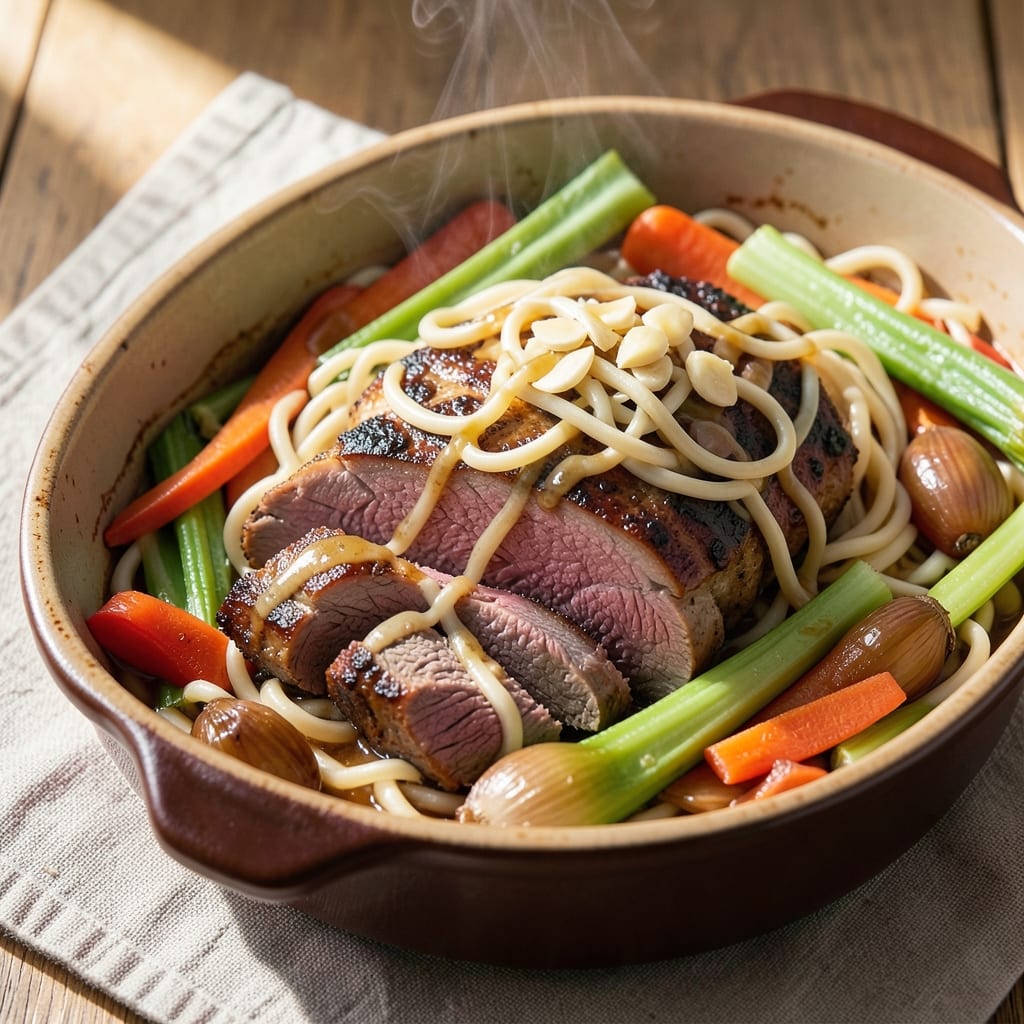
This chuck roast and egg noodles recipe transforms humble ingredients into a hearty, one-pan dinner that tastes like a restaurant classic. The secret lies in slow-braising the chuck roast until fork-tender while egg noodles soak up the deeply flavorful broth—no fancy techniques required, just patience and simple seasoning. I developed this dish after realizing how much easier it is to cook a single pot than juggle multiple dishes on busy weeknights.
The beauty of this recipe is its versatility—it works equally well as a weeknight meal or a comforting Sunday dinner. The chuck roast becomes melt-in-your-mouth tender when braised with aromatic vegetables and herbs, while the egg noodles absorb the rich, savory broth. The result is a dish that’s rich in flavor but simple to execute, perfect for feeding a family or impressing guests without stress.
What makes this recipe stand out is the balance of textures and flavors: the tender, shredded beef, the al dente noodles, and the caramelized vegetables all come together in one pot. The slow-cooked broth adds depth, while a sprinkle of fresh parsley brightens the dish at the end. Every bite delivers a satisfying combination of savory, tender, and slightly sweet notes that keep you reaching for more.
This one-pan approach means less cleanup and more time enjoying the meal. Whether you're a busy parent, a home cook looking for a reliable recipe, or someone who loves hearty comfort food, this chuck roast and egg noodles dish delivers restaurant-quality results with minimal effort. Let’s get started!
Ingredients for chuck roast and egg noodles
Simple ingredients for a restaurant-worthy one-pan dinner that feeds four heartily.
| Ingredient | Amount | Notes |
|---|---|---|
| Chuck Roast 🥩 | 2 ½ lb | Bone-in preferred for flavor |
| Egg Noodles 🍝 | 12 oz | Fresh or dried, al dente preferred |
| Yellow Onion 🧅 | 1 whole | Medium size, chopped |
| Carrots 🥕 | 3 medium | Peeled, sliced into rounds |
| Celery Stalks 🧄 | 3 whole | Trimmed, chopped |
| Garlic Cloves 🧄 | 4 cloves | Minced for depth |
| Tomato Paste 🍅 | 2 tbsp | Smooth, not chunky |
| Beef Broth 💧 | 3 cups | Low-sodium preferred |
| Dry Red Wine 🍷 | ½ cup | Bold variety like Cabernet |
| Fresh Thyme 🌿 | 2 sprigs | Or 1 tsp dried thyme |
| Fresh Rosemary 🌿 | 1 sprig | For aromatic depth |
| Bay Leaves 🌿 | 2 whole | Remove before serving |
| Salt 🧂 | 1 ½ tsp | Kosher or sea salt |
| Black Pepper 🌶️ | 1 tsp | Freshly ground |
| Fresh Parsley 🌿 | ¼ cup | Chopped for garnish |
The chuck roast is the star here—look for well-marbled cuts at your local butcher or grocery store's meat department. Costco and Trader Joe's often carry excellent chuck roasts at reasonable prices. Bone-in pieces add extra flavor, but boneless works too. For the egg noodles, fresh is ideal but dried holds up well in the braising liquid. The vegetables—onion, carrots, and celery—form the aromatic base, so don't skimp on freshness. Wilting or discolored veggies will make the dish taste flat, so grab the freshest from the produce section.
No red wine? Substitute with extra beef broth—just add another half cup. Fresh thyme and rosemary can be swapped for dried versions at one-third the amount, but the flavor won't be as vibrant. For tomato paste, Trader Joe's squeeze tubes are perfect—they're convenient and last longer. The carrots can be baby carrots if that's what's available, but whole carrots stay crisp longer during braising. If you're short on time, pre-chop the vegetables and store them in a sealed container in the fridge for up to 3 days.
This dish tastes even better the next day—plan ahead and make extra. Store leftovers in an airtight container in the fridge for 4-5 days or freeze for 3 months. The flavors meld beautifully overnight, so reheating is a must. For serving, portion the noodles and beef separately and let guests assemble their own bowls. The broth reduces slightly when refrigerated, so add a splash of water or broth when reheating to restore richness.
Why You'll Love This Recipe
- One-Pot Magic: I swear by this—just dump everything in a pot, simmer, and forget it. The onions caramelize right into the broth while the roast falls apart, so tender it melts. No fancy steps, no stress.
- Deep, Savory Bite: That chuck roast? It’s the star—rich, beefy, and packed with flavor after hours of slow cooking. The egg noodles soak up the juices like sponges, turning every bite into a hearty, satisfying mouthful.
- Leftovers That Don’t Suck: Honestly, this dish begs to be made extra. The flavors only get better the next day, and reheating it is a breeze—just add a splash of water or broth. My freezer’s full of these because they’re that good.
- Budget Meal for Crowds: A big chuck roast stretches for a family of four (or two very hungry people). The veggies—onion, carrots, celery—are cheap staples, and egg noodles? Always affordable. Feed everyone without breaking the bank.
Step-by-step instructions for chuck roast and egg noodles
This one-pan method delivers deep flavor and tender meat without complicated techniques.
Sear the Chuck Roast for Maximum Flavor
Pat the 2.5 lb chuck roast dry with paper towels and season generously with 1.5 tsp salt and 1 tsp black pepper. Heat a large Dutch oven over medium-high heat until very hot. Add the roast and sear on all sides for 4-5 minutes per side until deeply browned. This step creates the flavor foundation through the Maillard reaction.
Once browned, remove the roast and set it aside. Don't clean the Dutch oven—those browned bits will form the rich base for your sauce. This searing step is critical for developing the deep, savory flavor that carries through the entire dish. If your pan isn't hot enough, the roast will steam instead of brown.
Build the Aromatic Vegetable Base
In the same Dutch oven, add 2 tbsp tomato paste and cook for 1 minute to deepen its flavor. Add 1 whole yellow onion, 3 medium carrots, and 3 whole celery stalks, all chopped into even pieces. Cook for 5-6 minutes until the vegetables begin to soften and release their juices.
Stir in 4 cloves minced garlic, 2 sprigs fresh thyme, 1 sprig fresh rosemary, and 2 whole bay leaves. Pour in 0.5 cup dry red wine and scrape up all the browned bits from the bottom of the pan. This deglazing step captures all the flavor you worked so hard to create during searing. Let the wine simmer for 2-3 minutes until reduced by half.
Simmer the Roast with Herbs and Broth
Return the seared chuck roast to the Dutch oven. Add 3 cups beef broth and bring to a gentle simmer. Cover and cook on low heat for 2 hours, turning the roast occasionally. The meat should become fork-tender as it slowly cooks in its own juices and the aromatic broth.
After 2 hours, check the internal temperature with a meat thermometer. The roast should reach 195-205°F—this is the "probe-tender" stage where collagen breaks down and the meat becomes incredibly tender. If it hasn't reached this temperature, continue cooking for another 30-45 minutes. This low-and-slow cooking method transforms tough chuck roast into melt-in-your-mouth perfection.
Cook the Egg Noodles Directly in the Pot
Once the roast is tender, remove it from the pot and set it aside. In the same Dutch oven (no need to clean it), add 12 oz egg noodles and stir to coat them in the flavorful broth. Add 1 cup fresh water to help the noodles cook properly. Bring to a boil, then reduce heat to medium-low and simmer for 8-10 minutes until the noodles are al dente.
The beauty of this method is that the noodles absorb all the rich flavors from the roast cooking process. If the liquid seems insufficient, add another ½ cup beef broth to ensure the noodles cook properly. You want them tender but still with a slight bite—this ensures they hold up well when mixed with the roast.
Combine and Serve with Fresh Herbs
Return the tender chuck roast to the Dutch oven with the cooked egg noodles. Stir gently to combine, coating the roast in the noodles and sauce. Let it heat through for 2-3 minutes on low heat. The residual heat will finish cooking the noodles perfectly while allowing the roast to absorb any remaining juices.
Remove from heat and stir in 0.25 cup chopped fresh parsley. Taste and adjust seasoning if needed—you may need a pinch more salt or pepper. The dish should be rich, savory, and deeply flavorful from the slow-cooked roast. Serve immediately while hot, with additional fresh parsley sprinkled on top for brightness.
Pro Tips For Making Chuck Roast And Egg Noodles
- SEAR THE ROAST HARD: I learned this the hard way—skipping a deep sear means your chuck roast will turn out tender but bland. Get that pan screaming hot (medium-high to high) and let the meat develop a crust for 3-4 minutes per side before you even think about adding liquid. The Maillard reaction isn’t optional here—it’s what makes the flavor pop when it eventually melts into the noodles.
- DICE VEGETABLES UNIFORMLY: Your future self will thank you if you spend 10 extra minutes chopping the onion, carrots, and celery into exactly ¼-inch pieces. No, your knife skills aren’t that impressive yet—this isn’t a stew where big chunks hide. Even cooking means every bite gets the same texture, and that’s the difference between a comforting bowl and one where you’re picking out mushy bits.
- DON’T BOIL THE NOODLES DRY: Egg noodles release starch like crazy when overcooked, and that’s the last thing you want in a rich chuck roast stew. Pull them out al dente—firm to the bite—and toss them straight into the pot with the roast and veggies. The residual heat will finish them perfectly while they soak up all that meaty goodness. (Yes, even if you’re impatient like me.)
- BROWN THE VEGETABLES FIRST: This isn’t the prettiest method, but it’s the tastiest. Sauté the onions, carrots, and celery in the same pan you seared the roast in—just 5-6 minutes until they’re soft but still holding their shape. The residual meaty flavor clinging to the pan infuses the veggies, and you skip the step of scraping burnt bits later. (Your future cleanup will thank you.)
Common mistakes when making great chuck roast and egg noodles
Overcooking the Roast
One of the biggest mistakes is letting the chuck roast cook too long, which turns it dry and stringy instead of tender. The goal is to reach 195-205°F internal temperature—this is the "probe-tender" stage where collagen breaks down beautifully. I've ruined perfectly good roasts by walking away and forgetting them on low heat for hours. Set a timer and check the temperature frequently after 2 hours of cooking. If it's not there yet, add 30-45 minutes more, but don't exceed 3 hours total or you'll regret it. 🌡️
Skipping the Sear
Many home cooks skip searing the roast, thinking it's not essential. But that crispy brown crust from the Maillard reaction is where all the deep, savory flavor lives! I've made this dish both ways, and the seared version tastes like a completely different meal. Heat your Dutch oven until it's smoking hot, then sear the roast for 4-5 minutes per side until deeply browned. Those browned bits at the bottom of the pan become the flavor foundation for your entire dish.
Using Low-Quality Broth
Store-bought broth can make or break this dish. I've used everything from bouillon cubes to premium low-sodium beef broth, and the difference is night and day. The broth carries all the flavors from the roast and vegetables, so don't skimp. My go-to is Kirkland Signature Organic Beef Broth—it's affordable and packed with flavor. If you're using bouillon, add 2 cubes to 3 cups hot water to replicate the depth of a quality broth. The sodium content matters too—high-sodium broth will make your dish taste bland and salty.
Not Deglazing Properly
After searing the roast, those browned bits sticking to the bottom of your Dutch oven are flavor gold. Many cooks just dump everything in without scraping them up, which means losing half the flavor. After removing the roast, add 0.5 cup dry red wine (or extra broth) and scrape vigorously with a wooden spoon. Let it simmer for 2-3 minutes until reduced by half—this creates a rich, concentrated sauce that ties everything together. I've learned this the hard way by skipping this crucial step and ending up with a much flatter-tasting dish.
Adding Noodles Too Early
Some recipes suggest adding noodles at the beginning, but this dilutes the flavorful broth and turns the dish into a mushy mess. The noodles should cook in the rich, reduced sauce at the end to absorb all the deep flavors. Cook the roast first until tender, then remove it before adding the noodles. This way, they cook in a flavor bomb of beefy, herby goodness. If you're worried about the noodles absorbing too much liquid, add just 1 cup water to help them cook properly—you can always add more broth if needed.
Ignoring the Resting Period
After removing the roast from the pot, it's tempting to cut into it immediately. But letting it rest for 10-15 minutes before shredding or slicing makes all the difference. The meat continues to cook slightly from residual heat, and the juices redistribute, keeping every bite moist. I've shredded roasts too soon and ended up with dry, stringy meat. Trust the process—patience here pays off with incredibly tender results. While it rests, use that time to cook the noodles in the same pot to maximize flavor absorption. ✨
Nutrition facts
Frequently asked questions
Can I use a different cut of beef instead of chuck roast?
While chuck roast is ideal for this recipe, you can substitute with chuck shoulder or bottom round roast if needed. Avoid lean cuts like sirloin—they won't become tender with the same cooking method. For best results, choose a cut with good marbling and at least 1 inch of fat for moisture during slow cooking.
How do I make this dish ahead of time?
This recipe actually tastes better the next day! Cook the roast and broth as directed, then refrigerate overnight. The next day, reheat gently in the same pot with a splash of water or broth. Add fresh egg noodles cooked separately to avoid mushiness. For freezing, cook the roast completely, then store with its juices (without noodles) for up to 3 months. Thaw overnight in the fridge before reheating.
What if I don't have red wine?
No problem! Replace the 0.5 cup red wine with 0.5 cup beef broth or apple cider vinegar for acidity. For extra depth, add 1 tsp Worcestershire sauce or ½ tsp balsamic vinegar. The dish will still be flavorful—just slightly less complex. The key is maintaining the same liquid volume for proper braising.
Can I make this in a slow cooker?
Sear the roast first (critical for flavor), then transfer to a slow cooker with all ingredients except noodles. Cook on low for 8 hours or high for 5-6 hours. Add noodles during the last 30 minutes of cooking. The slow cooker method works especially well for busy days—just don't skip the initial searing step! The texture will be slightly more tender than stovetop.
How do I serve this dish for a crowd?
Double the recipe and use a large stockpot or Dutch oven. For serving, set up a buffet with:
- Shredded roast in a bowl
- Cooked noodles in another
- Extra broth for drizzling
- Fresh parsley and grated Parmesan on the side