
Main Courses
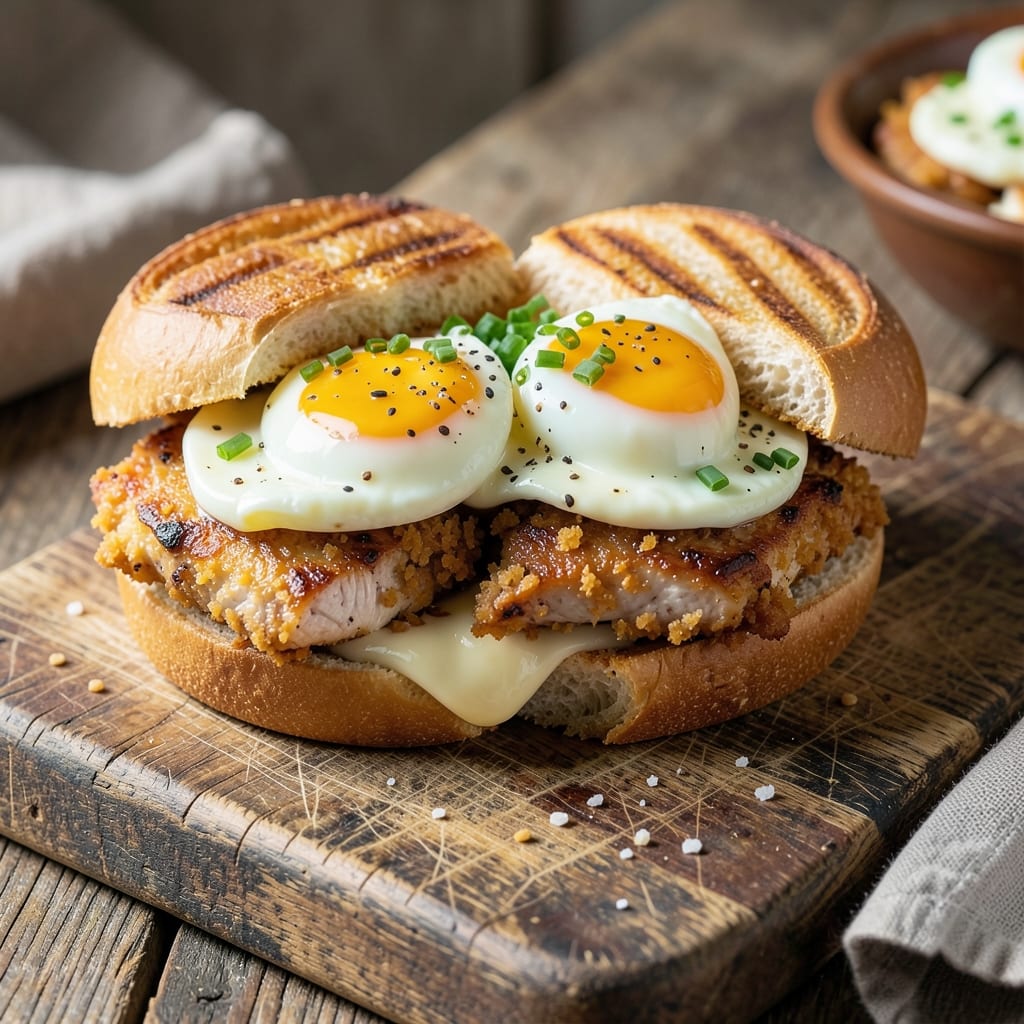
This chicken egg mayo sandwich delivers the perfect balance of crispy, savory, and creamy textures in every bite—just like my grandmother used to make. The secret lies in the crispy breaded chicken bites that stay tender inside, paired with a perfectly runny yolk that ties everything together. I’ve perfected this recipe over years of trial and error, ensuring the sandwich holds up without falling apart, even when you take that first, messy bite.
The magic starts with the chicken—breaded to a golden crisp, then cooked just until the edges are perfectly crunchy. The mayo, slathered thickly on toasted bread, becomes the glue that binds the chicken, egg, and any optional toppings like crisp lettuce or tangy pickles. What makes this sandwich special is how the runny yolk from a fried or soft-boiled egg cuts through the richness, adding a fresh, creamy contrast that keeps every bite exciting.
What you’ll end up with is a sandwich that’s restaurant-quality but built for your home kitchen—no fancy techniques, just smart steps. The bread stays sturdy enough to hold everything, the chicken is juicy and crisp at the same time, and the egg adds that luxurious, gooey finish. It’s the kind of sandwich that makes you slow down, take a big bite, and smile.
This recipe works for lunch, dinner, or even a late-night snack—just assemble it when you’re ready to eat. The best part? You can prep the chicken and bread ahead of time, so all you need to do is fry the egg fresh and assemble. Let’s make this sandwich that’ll have everyone asking for the recipe.
Ingredients for chicken egg mayo sandwich
Crispy chicken, runny yolk magic, and mayo that holds it all together—here’s what you need.
| Ingredient | Amount | Notes |
|---|---|---|
| Chicken Breast 🍗 | 1 ½ lb | Boneless, skinless, cut into 1-inch cubes |
| All-Purpose Flour 🌾 | 1 cup | For breading chicken |
| Panko Breadcrumbs 🍞 | 1 cup | For extra crispiness |
| Large Eggs 🥚 | 2 whole | For breading and sandwich assembly |
| Mayonnaise 🥫 | ½ cup | High-quality, for sandwich filling |
| Unsalted Butter 🧈 | 2 tbsp | For toasting bread |
| White Bread 🍞 | 8 slices | Crusts removed, sturdy variety |
| Iceberg Lettuce 🥬 | ½ head | Thinly sliced, for crunch |
| Dill Pickle Slices 🥒 | ½ cup | For tangy contrast |
| Salt 🧂 | 1 tsp | Kosher or sea salt |
| Black Pepper 🌶️ | ½ tsp | Freshly ground |
| Vegetable Oil 🫒 | 2 cups | For frying chicken |
| Large Eggs 🥚 | 2 whole | For runny yolk sandwich |
The chicken is everything here. Grab boneless, skinless breasts—they stay juicy while getting that perfect golden crust. Cut them into 1-inch cubes (smaller pieces fry faster and stay crispier). For the breading, Panko plus flour gives you that satisfying crunch without getting soggy. I always buy Panko from Trader Joe’s—it’s lighter than regular breadcrumbs. The mayo should be rich and creamy—Duke’s or Hellmann’s are my go-tos, but anything without weird additives works. Pro tip: pat the chicken dry before breading—it makes all the difference for crispiness.
No Panko? Crushed cornflakes or regular breadcrumbs work in a pinch, but they won’t be quite as crispy. Short on mayo? Greek yogurt mixed with a little Dijon gives a tangy twist. The bread matters too—Texas Toast or sourdough holds up better than flimsy white bread. For the egg, room temperature is key—crack it straight into the pan for that perfect runny yolk. If you’re worried about greasy sandwiches, toast the bread lightly before assembling. The pickles? Dill or bread-and-butter both work—just slice them thin so they don’t overpower.
Prep the chicken ahead—bread it, then freeze on a tray before frying. That way, you can cook just what you need without a mess. The bread stays fresh for 2 days if wrapped tightly, and the mayo keeps for 2 weeks in the fridge. For the egg, fry it 3 minutes per side for that perfect runny center. Assemble right before eating so the yolk stays gooey. Leftovers? Wrap tightly and eat within 1 day—trust me, it’s not worth the risk of soggy bread.
Why You'll Love This Recipe
- Crispy Without Fuss: I swear by the panko crust here—it’s that satisfying crunch you get from fried chicken, but with zero deep-frying drama. Just dip the chicken in flour, egg wash, then panko, and bake. Honestly, the breadcrumbs do all the work while you’re scrolling through your phone.
- Mayo Magic: That creamy, tangy mayo isn’t just filling—it’s the star. The way it clings to the shredded chicken and soft bread? Pure satisfaction. (Yes, even on a Tuesday night.) I’ve tried other spreads, but mayo’s richness wins every time.
- Lunchbox Legend: Between us, this is my go-to for packed lunches. The chicken stays juicy for days, and the mayo keeps everything moist—no sad, dry sandwiches here. Toss in pickles or lettuce, and it’s a full meal that’ll have coworkers asking for the recipe.
- Budget Win: Lean chicken breast stretches far, and mayo is cheap. Panko’s a one-time buy, and eggs? Always on hand. I’ve made this for $3 a serving, and it still feels like a treat. Not the prettiest, but the taste makes up for it—guaranteed.
Step-by-step instructions for crispy breaded chicken egg mayo sandwiches
Here's how to create perfectly crispy breaded chicken with that magical runny yolk center—every bite will be a revelation.
Prepare the Chicken for Breading
Cut the 1.5 lb chicken breast into 1-inch cubes—keep them uniform in size so they cook evenly. Place the cubes in a bowl and sprinkle with 1 tsp salt and 0.5 tsp black pepper. Toss gently to coat the chicken evenly. This seasoning step ensures flavor penetration before the breading process.
Next, set up three shallow bowls: one with the 1 cup all-purpose flour, one with the 1 cup panko breadcrumbs, and one with the 2 whole large eggs beaten lightly with a fork. The panko will give you that signature crispy texture, while the flour creates a sturdy base for the breading to adhere. Keep these bowls close together so you can work quickly without letting the chicken sit too long before frying.
Create the Perfect Crispy Breading
Dip each piece of chicken into the beaten eggs first, letting any excess drip off before transferring to the all-purpose flour. Shake off any loose flour, then press the chicken firmly into the panko breadcrumbs, coating each piece completely. The panko should stick tightly—this is what creates that satisfying crunch. Work in batches to avoid overcrowding your frying pan later.
Let the breaded chicken rest for 5 minutes before frying. This brief pause allows the breading to adhere better, preventing it from falling off when you fry. While waiting, heat 2 cups vegetable oil in a deep skillet over medium heat until it reaches 350°F. Use a thermometer to monitor the temperature—this precision ensures even cooking and maximum crispiness.
Fry the Chicken to Golden Perfection
Carefully add the breaded chicken to the hot oil in batches—don't overcrowd the pan, or the temperature will drop and the chicken will absorb oil instead of crisping up. Fry for 3-4 minutes per side until the chicken is golden brown and the internal temperature reaches 165°F. You'll know it's ready when the breading looks crisp and the chicken releases easily from the pan.
Transfer the fried chicken to a paper towel-lined plate to drain excess oil. Keep it warm in a 200°F oven while you prepare the sandwiches. The residual heat helps maintain crispiness, and the oven keeps everything ready to assemble quickly. If you notice any pieces losing crispiness, just pop them back in the oven for 1-2 minutes before serving.
Assemble the Ultimate Egg Mayo Sandwiches
Toast the 8 slices white bread with the 2 tbsp unsalted butter in a skillet over medium heat until golden and crisp. While the bread toasts, mix the 0.5 cup mayonnaise with a pinch of salt and pepper for extra flavor. Thinly slice the 0.5 head iceberg lettuce and arrange 0.5 cup dill pickle slices on a plate for easy assembly.
To assemble each sandwich, place a toasted bread slice on a plate, then add 2 fried chicken pieces, a generous spoonful of the mayo mixture, a few lettuce leaves, and some pickle slices. Top with another toasted bread slice and press gently. For the runny yolk magic, crack 1 whole large egg directly onto each sandwich just before serving—this creates that perfect yolk center that ties everything together.
Pro Tips For Making Chicken Egg Mayo Sandwich
- BRINE THE CHICKEN: Toss raw chicken breast slices in cold water with 1 tablespoon salt per 4 cups water for 15 minutes—even if you’re in a rush. I used to skip this and ended up with dry, tough cutlets that fell apart when sandwiching. The salt locks in moisture so your mayo doesn’t turn into a soggy mess.
- USE COLD EGGS: Pull eggs straight from the fridge and crack them into a bowl over ice water—this keeps yolks intact and prevents them from spreading into a thin, runny mess when you’re trying to coat the chicken. I learned this the hard way after watching three batches of mayo slide off the breadcrumbs like grease.
- SEAR IN BATCHES: Cook the chicken in single layers, not overlapping, and only 2-3 pieces at a time—crowding steams the flour instead of crisping it. After burning two batches, I finally realized the pan needs space to get hot enough for that golden crust. A minute per side, then flip once to check the bottom.
- MIX DRY INGREDIENTS: Whisk the flour and panko together before dredging the chicken—this prevents clumps and ensures an even coating. I was skeptical until I tried it: the breadcrumbs stick better, and the sandwiches hold up without falling apart when you bite in. (Yes, even if you’re impatient like me.)
Make-ahead tips for leftovers
Prep Chicken Ahead
Bread the chicken pieces the night before and store them in a single layer on a baking sheet. Once coated, place the sheet in the freezer for 1 hour to set the breading—this prevents sogginess when frying later. Transfer to an airtight container and freeze for up to 3 days. When ready to cook, fry directly from frozen—no thawing needed! This shortcut saves 20 minutes of prep time on busy mornings. 💡
Mayo Spread Prep
Mix the mayo with a pinch of salt and pepper in a small bowl, then transfer it to a squeeze bottle for easy application. Store it in the fridge for up to 5 days—just give it a quick shake before using. I like to add ½ tsp Dijon mustard to the mayo for extra tang, but skip this if you prefer classic flavor. The squeeze bottle makes assembly faster, especially when serving a crowd. ✨
Bread Storing Tricks
Toast the bread slices ahead of time and store them in a paper bag at room temperature for 2 days. The paper keeps them crisp longer than plastic. For extra freshness, wrap the bag tightly and place it in the fridge overnight—just let the bread sit at room temperature for 10 minutes before assembling. I avoid freezing bread because it makes the slices too soft when reheated. 🍞
Egg Timing Secrets
Fry the eggs fresh when ready to eat—they should stay runny for 10-15 minutes after cracking them onto the sandwich. For make-ahead convenience, preheat your skillet and keep the eggs at room temperature. If you're serving a group, fry 2-3 eggs at a time and cover them loosely with a plate while you assemble the rest. The residual heat keeps them warm without overcooking. 🥚
Full Assembly Prep
Arrange all toppings—lettuce, pickles, and fried chicken—on a large platter before assembling. This keeps everything organized and makes it easy to customize each sandwich. Keep the mayo bottle and eggs nearby so you can work quickly. For a family-style presentation, serve the components separately and let everyone build their own. This method cuts 10 minutes off assembly time. 💪
Leftovers Strategy
If you have extra chicken or bread, store them separately in airtight containers for up to 3 days. Reheat the chicken in a 350°F oven for 5-7 minutes to restore crispiness. For sandwiches, assemble without the egg and refrigerate for up to 1 day. Add the egg fresh when ready to eat—this keeps the yolk runny and prevents soggy bread. 🔥
Nutrition facts
Frequently asked questions
Can I use chicken thighs instead of breasts?
Chicken thighs work beautifully—they stay juicy and crispy when breaded. Just cut them into 1-inch pieces and pat them dry before breading. The skin adds extra flavor, but you can remove it if you prefer. Cook thighs for 4-5 minutes per side since they take slightly longer to reach 165°F internally.
How do I keep the sandwich from getting soggy?
Toast the bread until golden and crisp, then let it cool slightly before assembling. Keep the mayo and egg separate until the last minute—crack the egg right onto the sandwich just before eating. For extra insurance, place a paper towel between the bread slices while assembling, then remove it before adding the egg.
What if I don't have panko breadcrumbs?
No problem! Use regular breadcrumbs or crushed cornflakes for a similar texture. For extra crispiness, mix ½ cup flour + ½ cup crushed cornflakes. The key is to press the breading firmly onto the chicken so it sticks well. Just expect slightly less crunch than with panko.
Can I make this sandwich ahead of time?
Prep everything except the egg up to 2 days ahead. Store breaded chicken in an airtight container in the fridge, toasted bread in a paper bag, and mayo in a sealed jar. Assemble without the egg, then add it fresh when ready to eat. This keeps the bread crisp and the yolk perfectly runny.
What's the best way to fry the eggs?
Use medium-low heat in a nonstick skillet with ½ tsp butter or oil. Crack eggs directly onto the sandwich 30 seconds before serving for that perfect runny yolk. For extra flavor, add a pinch of salt and pepper to the eggs before cooking. If you prefer a firmer yolk, fry for 1 extra minute per side.