
Main Courses
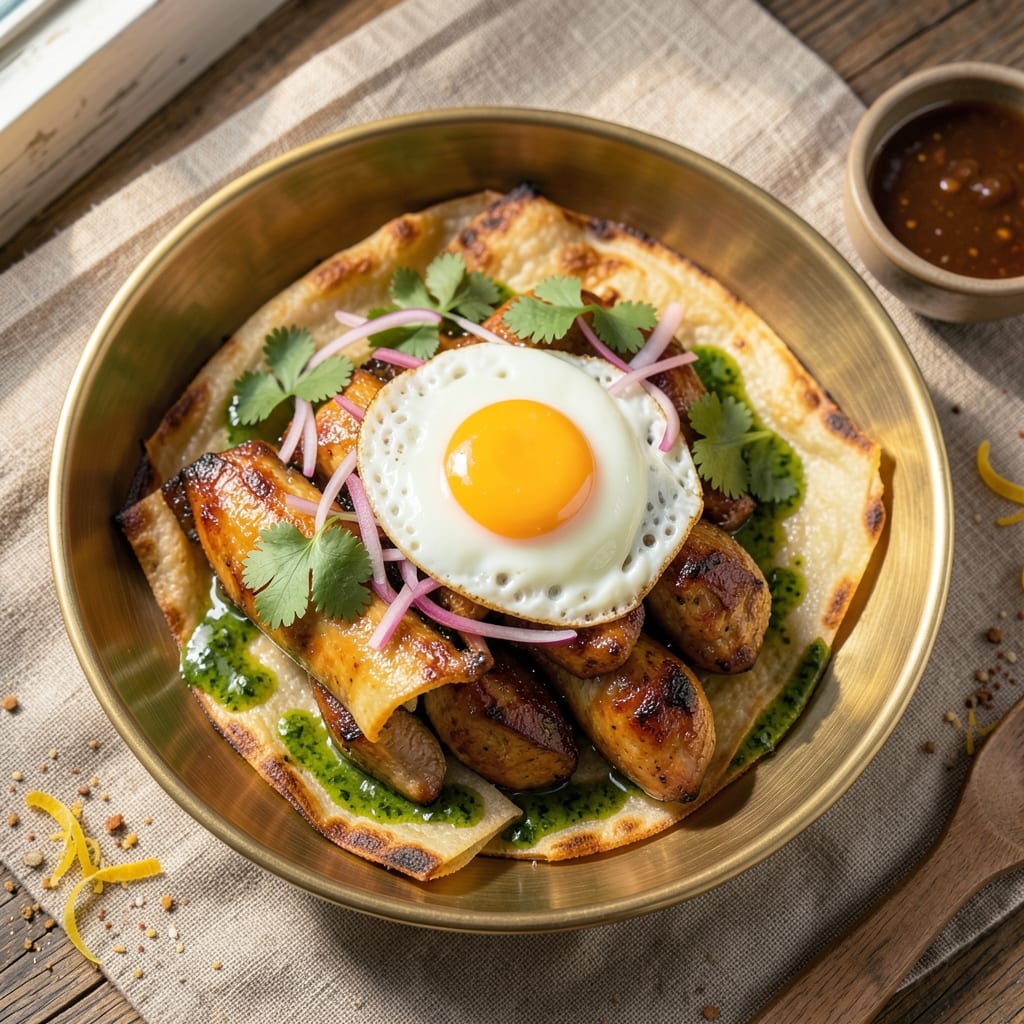
This flaky chicken egg kathi roll recipe transforms a classic street food staple into a restaurant-worthy dish that balances crisp paratha with rich, spiced scrambled eggs and chicken. The secret lies in perfectly layered dough that achieves that signature flakiness while wrapping around a filling so flavorful it disappears in seconds. I developed this recipe after years of perfecting paratha techniques—each fold and roll matters to create that signature crispy-yet-tender texture.
The magic happens in two parts: the paratha's delicate layers and the filling's perfect balance of spice and moisture. You'll start with a simple dough that gets rolled thin, brushed with ghee, and folded like a letter—this creates those signature flaky layers that become crispy when fried. Meanwhile, the filling combines tender chicken with scrambled eggs, aromatic spices, and just enough heat to make every bite exciting. The contrast between the crispy paratha and creamy filling is what makes this dish irresistible.
What you'll end up with is a dish that's both comforting and impressive—golden-brown paratha wrapped snugly around a filling that's rich, slightly spicy, and packed with protein. The aroma alone will have everyone gathered around your table, and the first bite delivers that perfect combination of textures and flavors. This is the kind of recipe that feels like a hug from a street vendor but with the precision of a professional kitchen.
Serve these kathi rolls with mint chutney or tamarind sauce for dipping, and watch as they disappear faster than you can say "more, please." The beauty of this recipe is its versatility—you can adjust the spice level, swap in different proteins, or even make it vegetarian. Let's get started on creating a dish that's equal parts nostalgic and innovative.
Ingredients for chicken egg kathi roll
Simple dough, bold flavors—everything you need for crispy, flaky kathi rolls packed with spiced chicken and eggs.
| Ingredient | Amount | Notes |
|---|---|---|
| All-Purpose Flour 🌾 | 2 ½ cups | Unbleached for best texture |
| Ghee 🧈 | ¼ cup | For brushing paratha layers |
| Plain Yogurt 🥛 | ½ cup | Whisked for dough |
| Salt 🧂 | 1 tsp | Fine sea salt preferred |
| Boneless Chicken Breast 🍗 | 1 lb | Cut into small pieces |
| Large Eggs 🥚 | 4 whole | Scrambled for filling |
| Ginger 🧄 | 1 tbsp | Freshly grated |
| Garlic Cloves 🧄 | 4 cloves | Minced for filling |
| Green Chilies 🌶️ | 2 whole | Slit lengthwise |
| Ground Cumin 🌿 | 1 tsp | Toasted for aroma |
| Ground Coriander 🌿 | 1 tsp | Freshly ground preferred |
| Turmeric Powder 🌶️ | ½ tsp | Bright yellow color |
| Red Chili Powder 🔥 | ½ tsp | Adjust for heat |
| Vegetable Oil 🫒 | ½ cup | For frying parathas |
| Fresh Cilantro 🌿 | ¼ cup | Chopped for garnish |
The ghee is non-negotiable for that signature flakiness. Gujarat or Amul brands are my go-to—they've got the right consistency. If you can't find ghee, clarified butter (makhan) works too. For the chicken, boneless breast cuts evenly—ask your butcher to trim any excess fat. Fresh ginger and garlic make all the difference here. Grab the root ginger from the produce section (not the jarred stuff)—it's brighter and more aromatic. The yogurt should be plain, not flavored, and room temperature for the dough.
No ghee? Melted butter works in a pinch, but it burns faster when frying. Short on cilantro? Fresh parsley at half the amount keeps the brightness. The green chilies can be swapped for jalapeños or serrano peppers if you like more heat. For the spices, Penzeys or Spicewalla have the best quality, but regular grocery store brands work fine. Toast your whole spices (cumin, coriander) for 30 seconds in a dry pan—it deepens the flavor. The dough needs to rest for 30 minutes before rolling, so plan ahead.
Dough keeps for 2 days wrapped in plastic in the fridge. The filling can be prepped 1 day ahead—just reheat gently before wrapping. Parathas freeze beautifully—1 month in a sealed bag with parchment between layers. To reheat, warm in a dry pan for 2 minutes per side. The filling reheats best in a microwave for 30 seconds with a damp paper towel covering it—keeps it moist.
Why You'll Love This Recipe
- No-Fuss Dough: I swear by this recipe because the dough only needs flour, yogurt, and ghee—no yeast, no waiting, no fuss. Roll it out while the chicken cooks, and you’re golden.
- Spice-Packed Bite: That crispy, spiced chicken folded inside with a soft egg? It’s the kind of flavor combo that makes you reach for seconds without thinking. The ghee in the dough adds richness that just can’t be beat.
- Picnic or Party: Pack these in foil for a picnic, serve them at a potluck, or even freeze them for lazy days. They’re sturdy enough to travel but still taste fresh—no reheating needed.
- Budget Breakfast Win: Boneless chicken and basic pantry staples mean this is my go-to when I need a filling, protein-packed meal without breaking the bank. Plus, leftovers reheat perfectly—just slap them in a pan.
Step-by-step instructions for chicken egg kathi roll recipe
Here's how to create perfectly flaky parathas wrapped around a spiced chicken-egg filling—crispy, tender, and packed with flavor.
Prepare the Spiced Chicken-Egg Filling
Cut the 1 lb boneless chicken breast into small, even pieces—about ½-inch cubes. Heat 0.5 cup vegetable oil in a non-stick pan over medium-high heat. Add the chicken and cook for 5-6 minutes, stirring occasionally, until it turns white and loses its pink color.
Lower the heat to medium and add the 1 tbsp freshly grated ginger, 4 cloves minced garlic, and 2 slit green chilies. Sauté for 1 minute until the raw smell disappears. Sprinkle in 1 tsp ground cumin, 1 tsp ground coriander, 0.5 tsp turmeric powder, and 0.5 tsp red chili powder, stirring well to coat the chicken. Cook for another 2 minutes until the spices bloom and release their aroma.
Push the chicken to one side of the pan and crack in the 4 whole large eggs. Scramble them gently, then mix everything together. Cook for 2-3 minutes until the eggs are just set but still slightly runny. Remove from heat and fold in the 0.25 cup chopped fresh cilantro. Let the filling cool slightly—it should be warm but not hot when you roll the parathas.
Make the Paratha Dough and Rest
In a large mixing bowl, combine the 2.5 cups all-purpose flour and 1 tsp salt. Add the 0.5 cup plain yogurt and 0.25 cup ghee, then knead everything into a smooth, firm dough. I like to use my hands for this—press, fold, and stretch the dough for 8-10 minutes until it's elastic and no longer sticky. If it feels too dry, add 1 tsp water at a time.
Cover the dough with a damp cloth and let it rest for 30 minutes at room temperature. This resting period relaxes the gluten, making the parathas easier to roll out and ensuring they stay flaky. I know it’s tempting to skip this step, but trust me—it makes all the difference in the final texture.
Roll and Cook the Parathas
Divide the dough into 8 equal balls (about 2-inch diameter each). Roll one ball into a 6-inch circle on a floured surface, keeping the thickness even—about ⅛-inch thick. Brush both sides lightly with ghee (you’ll use about 1 tbsp total). Heat a clean skillet over medium-high heat and place the rolled paratha on it.
Cook for 2-3 minutes until small bubbles form on the surface and the edges start to turn golden. Flip carefully with a spatula and cook the other side for another 1-2 minutes, pressing down gently with a clean cloth to encourage flakiness. Transfer to a plate and keep warm while you repeat with the remaining dough balls. The parathas should be soft and pliable, not crispy yet—they’ll crisp up when wrapped around the filling.
Assemble and Serve the Kathi Rolls
Take one warm paratha and spread 2-3 tablespoons of the chicken-egg filling along the center, leaving a ½-inch border on all sides. Fold the sides inward, then roll it up tightly like a burrito. Secure with a toothpick if needed. Repeat with the remaining parathas and filling.
Heat 0.25 cup vegetable oil in a clean skillet over medium heat. Place the rolled parathas seam-side down and cook for 2-3 minutes until golden brown on the bottom. Flip carefully and cook the other side for another 1-2 minutes until crispy and golden. Serve hot with mint chutney or tamarind sauce for dipping—each bite should be crispy on the outside, flaky inside, and packed with flavorful filling.
Pro Tips For Making Chicken Egg Kathi Roll
- Use Cold Ghee for Dough: I learned this the hard way—warm ghee makes the dough sticky and hard to handle. Keep your ghee in the fridge until you’re ready to mix it into the flour and yogurt. The cold fat coats the flour better, giving you a smoother, more workable dough that won’t stick to your hands or rolling pin.
- Boil Eggs Until Just Set: Overcooked eggs turn rubbery and ruin the texture of your roll. Boil them in salted water for exactly 6 minutes from a rolling boil, then plunge into ice water to stop cooking. They’ll be firm but still tender—perfect for slicing and layering without falling apart.
- Rest Chicken Before Slicing: Raw chicken breast can be tough and uneven when sliced. After cooking, let it rest under foil for 5 minutes. This evens out the temperature and makes it easier to slice into thin, even strips—no more chewy surprises when you bite into your roll.
- Prevent Overcrowding in Pan: I used to pile too much chicken in the pan, and it steamed instead of searing. Cook in batches—no more than 2 strips at a time—so the chicken gets a golden crust and stays juicy. Overcrowding is the fastest way to end up with soggy filling.
Serving suggestions for this chicken egg kathi roll
Plating Presentation
Serve these kathi rolls on a large wooden board or slate platter for an authentic street-food vibe. Arrange them slightly overlapping so the crispy edges peek out—this makes them look even more tempting. Garnish with extra chopped cilantro and a sprinkle of red chili powder for color contrast. I like to add a few lemon wedges on the side for guests to squeeze over their bites—it brightens the flavors and adds a zesty pop. 🌟
Dipping Sauces
No kathi roll is complete without a cooling dipping sauce. My go-to is mint chutney—blend 1 cup fresh mint leaves, ½ cup Greek yogurt, 1 tbsp lemon juice, ½ tsp cumin seeds, and 1 green chili until smooth. For a tangy twist, try tamarind sauce (mix ¼ cup tamarind pulp, 2 tbsp jaggery, and ½ cup warm water). Serve in small bowls with toothpicks for easy dipping. The sauce should complement, not overpower, the rich filling.
Side Dish Pairings
Balance the richness of the kathi rolls with a light, fresh side. A cucumber raita (grated cucumber, yogurt, roasted cumin, and salt) cuts through the oiliness beautifully. For something heartier, serve with onion bhajis—crispy fried onion fritters that add another layer of crunch. I also love pairing them with a simple cucumber salad tossed with lemon juice, salt, and black pepper—it’s refreshing and keeps the meal light. 🥗
Family-Style Serving
These rolls are perfect for sharing—lay them out on a large platter and let everyone grab their own. For a festive touch, arrange them in a circle with the dipping sauces in the center. I’ve hosted dinner parties where we serve them with sparkling lime soda (mix lime juice, soda water, and a pinch of salt) for a fun, bubbly drink pairing. The fizz cleanses the palate between bites and makes the whole experience feel special. 🍹
Meal Prep Tips
If you’re prepping ahead, assemble the kathi rolls but skip the final frying—store them wrapped in parchment paper in the fridge for up to 2 days. When ready to serve, heat a skillet over medium heat and fry each roll for 1-2 minutes per side until crispy. For a quick lunch, reheat the filling separately and wrap it into pre-made parathas—just fry them fresh for that crispy texture. The key is keeping the parathas soft until the last minute so they don’t dry out. ⏰
Nutrition facts
Frequently asked questions
Can I make these kathi rolls vegetarian?
Simply swap the chicken for 1 cup cooked chickpeas or ½ cup paneer cubes, and use 1 extra egg to bind the filling. Sauté the chickpeas with the same spices for 3 minutes until heated through. The texture will be slightly different but just as delicious when wrapped in the flaky paratha.
Why is my paratha dough cracking or tearing when rolling? This usually happens when the dough is too dry or hasn't rested long enough.
How do I get the parathas extra crispy?
For maximum crispiness, use hotter oil (test with a breadcrumb—it should sizzle immediately) and press down gently with a clean cloth while cooking. After the first flip, cook the second side for 30 seconds longer than usual. For an oven option, bake at 400°F for 10-12 minutes on a wire rack after frying for 1 minute per side.
Can I make the filling ahead of time?
Yes, but with one key tip: Let the filling cool completely, then store it in an airtight container in the fridge for up to 2 days. When ready to use, reheat it gently in a pan with 1 tbsp oil over low heat for 2-3 minutes, stirring constantly. Microwaving can make the eggs rubbery—always reheat on the stove.
What's the best way to store leftover kathi rolls?
Keep them in an airtight container at room temperature for 1 day, or refrigerate for up to 2 days. To reheat, warm in a dry skillet over medium heat for 1-2 minutes per side until crispy again. For longer storage, freeze uncooked assembled rolls (before final frying) for 1 month. Thaw overnight in the fridge and fry fresh for best results.