
Side Dishes
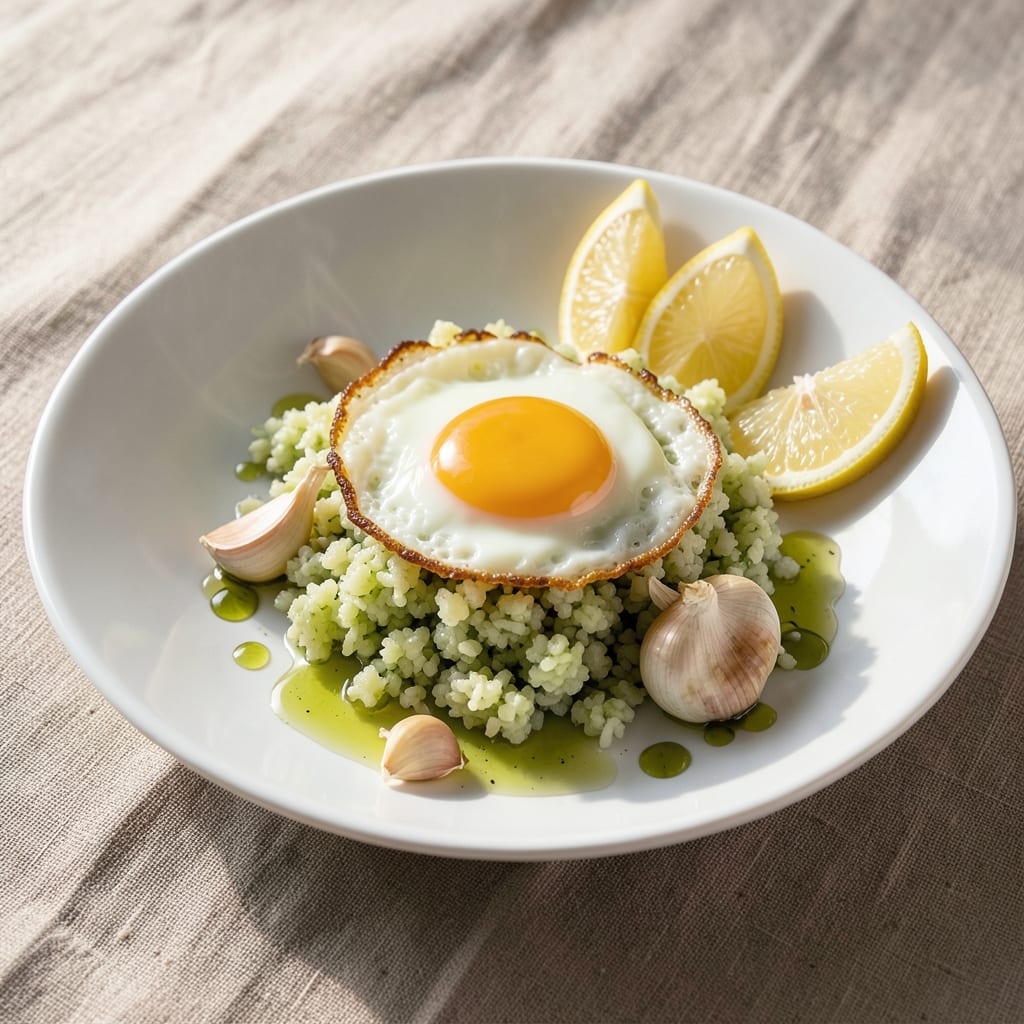
This cauliflower rice and egg recipe transforms a simple side into a satisfying, protein-packed vegetarian meal that's ready in under 20 minutes. The secret lies in perfectly crisp-tender cauliflower rice sizzled in garlic butter, paired with velvety scrambled eggs that stay moist and fluffy. I developed this dish during a busy week when I needed a quick, nutritious dinner that didn't skimp on flavor—it became an instant family favorite.
The magic happens in the pan: cauliflower rice gets a quick sear in garlic-infused butter until golden around the edges, while the eggs cook separately to achieve that ideal silky texture. Seasoning is key—just a pinch of salt, pepper, and a squeeze of lemon brightens both components without overpowering. This isn't just a low-carb side; it's a complete, balanced meal that feels indulgent yet light.
What you'll end up with is a plate of restaurant-quality scrambled eggs nestled alongside aromatic cauliflower rice, both bathed in rich garlic butter. The eggs maintain their creamy consistency while the cauliflower develops a satisfying crispness at the edges. Serve with a sprinkle of fresh parsley or a drizzle of hot sauce for extra brightness—this dish is versatile enough for breakfast, lunch, or dinner.
For a complete meal, pair it with avocado slices, a side salad, or toasted whole-grain bread. The recipe scales easily for two or four, making it perfect for weeknight dinners or meal prep. Ready in just 15 minutes, this dish proves healthy eating doesn't have to mean sacrificing flavor or convenience.
Ingredients for cauliflower rice and egg
Fresh cauliflower, velvety eggs, and aromatic butter create this quick vegetarian meal.
| Ingredient | Amount | Notes |
|---|---|---|
| Fresh Cauliflower 🥬 | 1 lb | Riced or pre-riced from bag |
| Large Eggs 🥚 | 6 whole | Room temperature for fluffiness |
| Unsalted Butter 🧈 | 3 tbsp | Cold, cubed for sizzle |
| Garlic Cloves 🧄 | 3 cloves | Minced for aromatic base |
| Extra-Virgin Olive Oil 🫒 | 1 tbsp | For extra richness |
| Fresh Lemon Juice 🍋 | 1 tbsp | Brightens flavors |
| Kosher Salt 🧂 | ½ tsp | Diamond Crystal preferred |
| Freshly Ground Black Pepper 🌶️ | ¼ tsp | For subtle heat |
| Fresh Flat-Leaf Parsley 🌿 | ¼ cup | Chopped for garnish |
| Avocado Oil 🫒 | 1 tbsp | For cooking eggs |
| Red Pepper Flakes 🌶️ | ⅛ tsp | Optional for heat |
The cauliflower is the star here—freshly riced (or pre-riced from a bag) gives the best texture. I always grab a whole head at Whole Foods or Trader Joe's since their organic cauliflower stays crisp longer. If using fresh, pulse it in a food processor until it resembles rice. The eggs? Room temperature makes all the difference for fluffy scrambles. For the butter, grab European-style if you can—it has higher fat content for that perfect sizzle. And the garlic? Freshly minced releases more flavor than jarred minced garlic.
No fresh parsley? Dried works at one-third the amount, but fresh is ideal for that bright pop of color. Short on butter? Olive oil works in a pinch, though it won't sizzle as dramatically. The avocado oil for eggs is optional but worth it—it has a neutral taste and high smoke point. For extra brightness, add a pinch of lemon zest to the eggs. The red pepper flakes are totally optional, but if you love heat, add them to the cauliflower rice at the end. Pre-riced cauliflower from Green Giant or Trader Joe's is my go-to for convenience—just make sure it's the fresh-cut variety, not the frozen kind.
Cauliflower rice keeps in the fridge for 5 days if stored in an airtight container, but it's best used fresh. The eggs should be used within 3 days of purchase for optimal texture. For meal prep, cook the cauliflower rice ahead and store it separately from the eggs—reheat the eggs in a skillet with a splash of water to keep them moist. This dish reheats beautifully, though the eggs are best served fresh. If you're making this for a crowd, double the batch—the extra rice reheats perfectly for lunches.
Why You'll Love This Recipe
- Here’s what sold me: that first bite where the cauliflower rice meets the pan-fried egg. The garlic-infused olive oil gives it a nutty depth, and the butter makes the eggs so rich, you’ll forget it’s low-carb.
- Two-Ingredient Base: I swear by this combo—cauliflower rice and eggs are my go-to when I’m staring at a half-empty fridge. The butter and garlic turn those two staples into something that feels like a restaurant dish, not a last-minute scramble.
- Crispy Garlic Edge: Here’s what sold me: that first bite where the cauliflower rice meets the pan-fried egg. The garlic-infused olive oil gives it a nutty depth, and the butter makes the eggs so rich, you’ll forget it’s low-carb.
- Meal Prep MVP: Between us, this is my secret weapon for busy mornings. Cook a big batch of cauliflower rice on Sunday, and you’ve got breakfast, a side for lunch, or even a quick stir-fry base all week—no reheating drama.
Step-by-step instructions for garlic-butter cauliflower rice and eggs
Here's how to transform simple ingredients into a restaurant-worthy dish with golden garlic butter and silky scrambled eggs.
Prepare the Cauliflower Rice
Start by ricing the 1 lb fresh cauliflower if using whole heads. I like to use a food processor with the grating blade, but a box grater works too—just make sure the pieces are rice-sized. Transfer the cauliflower rice to a clean kitchen towel and squeeze out any excess moisture. This step is crucial because wet cauliflower rice will steam instead of sizzle in the pan.
Heat 1 tablespoon avocado oil in a large skillet over medium-high heat. Add the cauliflower rice and cook for 5-6 minutes, stirring occasionally, until it's tender and slightly golden. You'll know it's ready when the edges start to brown—this adds great texture. Season immediately with 0.25 teaspoon freshly ground black pepper and 0.125 teaspoon red pepper flakes if using. Remove from the pan and set aside in a warm spot.
Create the Garlic-Butter Base
In the same skillet (no need to clean it—those browned bits add flavor), reduce the heat to medium and add 3 tablespoons unsalted butter and 1 tablespoon extra-virgin olive oil. Let the butter melt completely, then add the 3 minced garlic cloves. Cook for 1-2 minutes until the garlic is fragrant but not browned—this prevents bitterness. Here's the thing—don't walk away. Garlic burns quickly, and you want that sweet, aromatic flavor.
Add 1 tablespoon fresh lemon juice and stir for 30 seconds to brighten the flavors. Then return the cauliflower rice to the pan and toss to coat evenly in the garlic butter. Sprinkle with 0.5 teaspoon kosher salt and toss again. The cauliflower should be glossy and coated with that golden garlic butter—this is what makes the dish look (and taste) so impressive.
Scramble the Perfect Eggs
While the cauliflower rice warms, crack the 6 large eggs into a bowl. Add 0.25 teaspoon freshly ground black pepper and whisk vigorously until the yolks and whites are fully combined. I like to use a fork for this—it's simple and effective. The eggs should be completely uniform in color, which ensures even cooking and silky texture.
Return the skillet to medium-low heat (the residual heat from the cauliflower will help). Pour the egg mixture into the skillet and let it sit undisturbed for 10-15 seconds—this allows the eggs to set slightly at the bottom before gently stirring with a silicone spatula. Keep the heat low and stir slowly, folding the eggs over themselves as they cook. You're aiming for soft, creamy curds—not dry, rubbery eggs. Remove from heat when the eggs are still slightly runny in the center.
Combine and Finish
Transfer the scrambled eggs to the skillet with the cauliflower rice. Gently toss everything together, letting the eggs coat the cauliflower rice evenly. The residual heat will finish cooking the eggs perfectly. Taste and adjust seasoning if needed—sometimes the garlic butter needs a touch more salt. The dish should be vibrant, aromatic, and perfectly balanced between the savory garlic butter and the creamy eggs.
Divide the cauliflower rice and egg mixture among 4 plates. Garnish each serving with 1 tablespoon chopped fresh flat-leaf parsley for a pop of color and freshness. Serve immediately while the eggs are still warm and silky. This dish is best enjoyed right away—every bite should deliver that perfect combination of crisp-tender cauliflower rice, rich garlic butter, and velvety scrambled eggs.
Pro Tips For Making Cauliflower Rice And Egg
- Pulse, Don’t Grate: I learned this the hard way—cauliflower rice turns to mush if you grate it. Instead, chop the florets into small, even pieces (about ¼-inch thick) or pulse them in a food processor just until they resemble rice. Over-processing releases too much moisture, and your eggs will steam instead of sizzle.
- Salt the Cauliflower: Drain the chopped cauliflower, toss it with a pinch of salt, and let it sit for 5 minutes before cooking. This draws out excess water so it crisps up properly when you fry it later. (Yes, even if you’re impatient like me—trust the process.)
- High Heat, Fast Eggs: Get your pan screaming hot before adding the butter. A cold pan means greasy eggs and soggy cauliflower rice. Once the butter foams, crack the eggs in—no stirring until the whites set slightly, or you’ll scramble them instead of getting that perfect runny yolk.
- Toast the Garlic: Mince the garlic very finely (almost like a paste) and cook it in the butter until it’s golden, not brown. Overcooked garlic turns bitter, and you’ll taste it in every bite. Remove it just before the eggs go in so it doesn’t overpower the dish.
Essential equipment for great cauliflower rice and egg
Skillet Essentials
Your 10-inch cast iron skillet is the star of this recipe—it retains heat beautifully and creates that perfect sizzle. I use my Lodge Pre-Seasoned Cast Iron Skillet because it develops a natural non-stick surface over time. For a lighter option, a well-seasoned stainless steel skillet like All-Clad works too. Just make sure it's large enough to fit all your cauliflower rice without crowding. 🔥
If you don't have cast iron, a non-stick skillet with a 5-quart capacity (like Cuisinart MultiClad) is a great alternative. The key is medium-high heat control—cast iron holds heat longer, so you'll need to adjust timing slightly. For the eggs, I prefer a non-stick surface to prevent sticking, especially when folding those delicate curds.
Knife and Cutting Tools
A sharp chef's knife (I use Victorinox 8-inch) is essential for mincing that 3 cloves of garlic to a fine consistency. Dull knives crush garlic instead of chopping it, which releases bitter compounds. For the ¼ cup parsley, a pair of kitchen shears works perfectly for quick chopping. If you're ricing fresh cauliflower, a box grater or food processor with grating blade makes this step effortless.
Mixing and Whisking
For whisking the eggs, I reach for a balloon whisk (like OXO Good Grips)—it incorporates air beautifully for that light, fluffy texture. A fork works too, but the whisk creates more volume. When tossing the cauliflower rice in the pan, a silicone spatula is my go-to because it's heat-resistant and won't scratch your skillet. For serving, I use tongs to transfer the dish to plates without breaking up the texture.
Heat Control Tools
An instant-read thermometer (I love the Thermoworks ThermoPop) helps monitor your skillet's temperature—ideal heat for cauliflower rice is 325-350°F. For the eggs, I keep the heat at medium-low (around 275°F) to prevent overcooking. A kitchen timer (like my SimpleHuman 30-Minute) ensures you don't overcook either component. Pro tip: Rest your skillet on a heat-resistant pad while cooking to protect your countertops.
Storage and Serving
For storage, I use glass Pyrex storage containers with tight-sealing lids to keep the cauliflower rice fresh for up to 5 days. When reheating, I add a splash of water to the skillet to restore moisture. For serving, I love using ceramic plates—they keep the dish warm longer and look elegant. A small serving spoon helps portion the dish neatly, especially when garnishing with parsley. 💫
Nutrition facts
Frequently asked questions
Can I make this recipe without fresh cauliflower?
Pre-riced cauliflower from a bag works perfectly—just check the label for "fresh-cut" varieties. Avoid frozen cauliflower rice as it tends to get mushy when reheated. If using pre-riced, skip the grating step and proceed directly to drying it with a towel before cooking.
How do I keep the eggs from getting rubbery?
Low and slow is key! Cook eggs over medium-low heat and stir constantly with a silicone spatula. Remove them from heat when they're still slightly runny in the center—they'll finish cooking from residual heat. Adding a splash of water to the pan also helps maintain moisture.
Can I add other veggies to this dish?
Yes! Try diced bell peppers, spinach, or mushrooms—they cook quickly in the same pan. Add them with the cauliflower rice and cook until tender. For heartier meals, stir in cooked quinoa or chickpeas at the end. Just be mindful of cooking times to avoid overcrowding the pan.
Is this recipe suitable for meal prep?
For best results, cook the cauliflower rice ahead and store it separately from the eggs. Reheat the rice in the microwave for 1-2 minutes, then warm eggs separately in a skillet with a splash of water. The eggs are best served fresh, but this method keeps them moist when reheated.
What's the secret to perfect garlic flavor?
Freshly minced garlic is non-negotiable—it releases more flavor than jarred minced. Cook it just until fragrant (1-2 minutes) over medium heat to avoid bitterness. For extra depth, let the garlic sit in the melted butter for 30 seconds before adding the lemon juice.