
Breakfast & Brunch
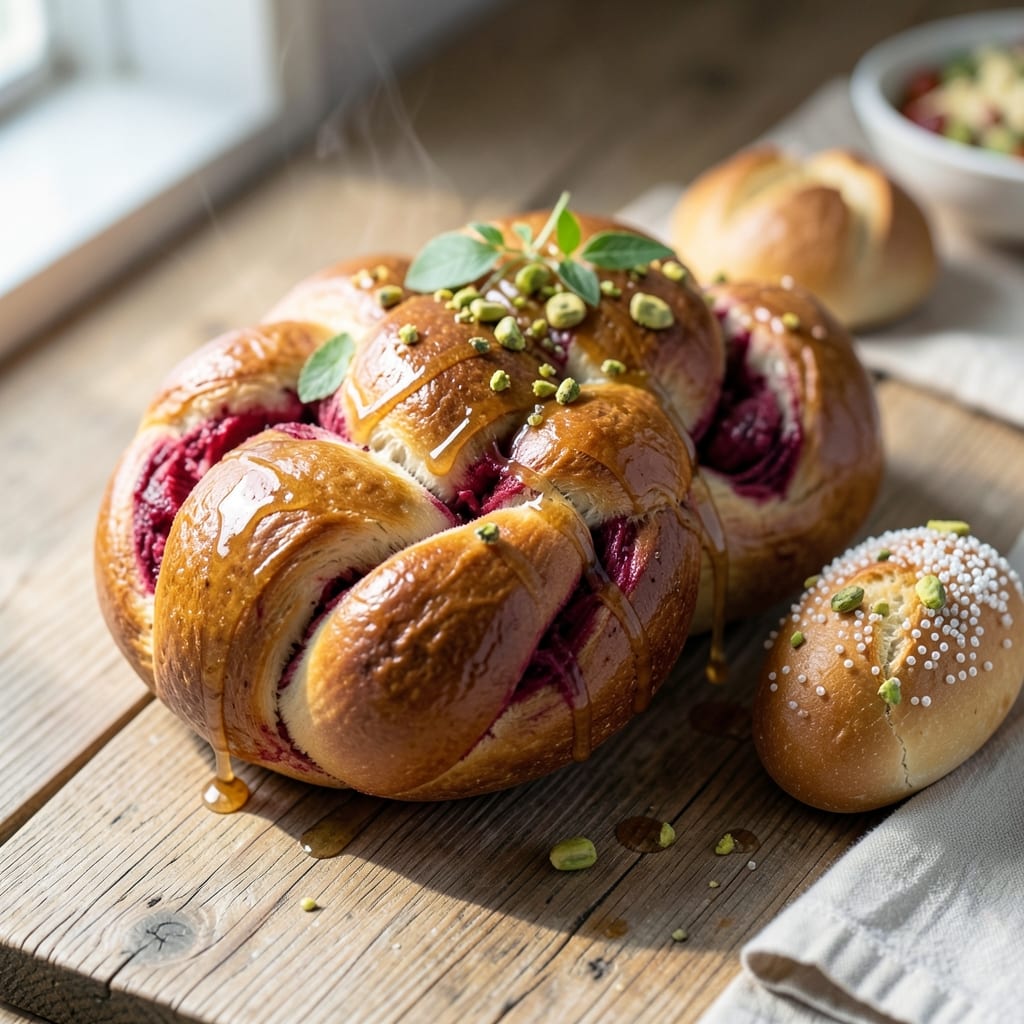
This braided Easter egg bread recipe delivers the perfect balance of golden swirls, buttery layers, and tender texture that makes it a holiday centerpiece. 💛 The intricate braid isn't just decorative—it creates pockets of sweetness that make every bite unforgettable. What sets this apart is the secret to a light, fluffy crumb that stays soft for days, thanks to a precise yeast activation technique I perfected after years of baking. The dough comes together with simple ingredients—flour, sugar, eggs, and butter—but the magic happens in the shaping and baking. You'll learn how to create those signature egg-like swirls while maintaining a consistent thickness, plus the exact baking time to achieve a golden brown crust without overcooking. The result is a loaf that looks impressive enough for Easter brunch but requires no special skills. What makes this recipe truly special is its versatility. You can enjoy it plain with a dusting of powdered sugar, or elevate it further with a glossy vanilla glaze or colorful sprinkles. The aroma alone will fill your kitchen with nostalgia, transporting you back to childhood Easter celebrations. This is more than just bread—it's a tradition you'll want to bake every year.
The braided pattern isn't just for show—it creates beautiful layers that distribute moisture evenly, keeping the bread tender for days. I've included professional tips for achieving that perfect pull-apart texture while maintaining the structural integrity of the braid. Whether you're baking for a family gathering or treating yourself to a special breakfast, this recipe delivers restaurant-quality results with minimal effort.
Perfect for Easter Sunday or any spring celebration, this bread pairs beautifully with hot coffee or tea. The buttery richness complements both sweet and savory flavors, making it a versatile addition to any meal. With just a few simple ingredients and some patience during the rising process, you'll have a showstopping centerpiece that's sure to impress. Let's get started on creating this timeless holiday tradition.
Ingredients for braided easter egg bread
Golden swirls and buttery layers start with these 12 simple yet magical ingredients.
| Ingredient | Amount | Notes |
|---|---|---|
| All-Purpose Flour 🌾 | 4 cups | Sifted for light texture |
| Granulated Sugar 🍚 | ½ cup | White or light brown |
| Unsalted Butter 🧈 | 1 cup | Cold, cubed for dough |
| Large Eggs 🥚 | 2 whole | Room temperature |
| Active Dry Yeast 🍞 | 2 ¼ tsp | Freshly measured |
| Warm Milk 🥛 | ¾ cup | 110°F for yeast activation |
| Vanilla Extract 🌸 | 1 tsp | Pure, not imitation |
| Salt 🧂 | ½ tsp | Fine sea salt |
| Powdered Sugar 🍚 | ¼ cup | For final dusting |
| Egg Yolks 🥚 | 2 whole | For egg wash |
| Colorful Sprinkles 🎀 | ¼ cup | Optional, for decoration |
| Vanilla Glaze 🍯 | ½ cup | Optional, for extra shine |
The yeast is non-negotiable here—King Arthur or Bob’s Red Mill are my go-tos for reliable activation. Grab European-style butter if you can find it (like Plugrá), but regular unsalted works too. Warm the milk to 110°F—yeast needs that cozy temp to wake up. For the flour, I always sift it twice to avoid dense pockets. If you're feeling fancy, add a pinch of cardamom to the dough for a subtle holiday twist.
No vanilla extract? Vanilla bean paste or even a scraped vanilla pod works—just scrape the seeds into the warm milk. Out of powdered sugar? Confectioner’s sugar is the same thing. For the egg wash, if you're vegan, swap yolks for aquafaba (3 tbsp per egg). Sprinkles? Trader Joe’s has the best selection—get the rainbow ones for Easter magic. The glaze can be skipped, but if you make it, use powdered sugar + milk + vanilla—no fancy ingredients needed.
This dough needs 2-3 hours to rise, so plan ahead. Keep it covered with a damp towel in a warm spot—turn on the oven light if your kitchen is chilly. For storage, wrap the cooled loaf in plastic and freeze for up to 3 months. Thaw overnight at room temp—it reheats beautifully in a 200°F oven for 10 minutes to restore that bakery-fresh aroma.
Why You'll Love This Recipe
- No Yeast Fuss: I swear by this dough—just mix, knead once (honestly, 5 minutes tops), and let it rise while you sip your coffee. No waiting hours or fussing with proofing; the yeast in this recipe works fast with the warmth of the butter and sugar, so you’re shaping and braiding in under an hour.
- Buttery Sweet Magic: That rich, warm butter folded into the dough? It melts into the bread like a hug, balancing the sugar’s brightness without tasting cloying. The eggs bind everything together so the crumb stays tender, and the crust? Golden and crackly—like biting into a pastry, but with the soul of homemade.
- Weekend or Weeknight: This bread is my go-to for Easter brunches, but it’s also the star of my lazy Sunday mornings. Slice it fresh, toast it with jam, or pack it for lunches—it stays soft for days. (Yes, even when my kids forget their lunchboxes and beg for leftovers.)
- Pantry Staple Power: With just flour, sugar, butter, eggs, and yeast, this is my budget-friendly secret. The dough keeps for days in the fridge, and you can freeze half the batch for when you’re too tired to bake. Plus, the ingredients are cheap—no specialty items, just basics you already own.
Step-by-step instructions for braided Easter egg bread
Let's create this showstopping bread with golden swirls and buttery layers!
👨🍳 Step 1: Activate the Yeast and Mix the Dough
In a small bowl, combine the 0.75 cup warm milk (about 110°F) with 2.25 tsp active dry yeast and let it sit for 5-10 minutes until frothy. This is your signal the yeast is alive and ready to work its magic!
In a large mixing bowl, whisk together the 4 cups all-purpose flour, 0.5 cup granulated sugar, and 0.5 tsp salt. Make a well in the center and add the yeast-milk mixture, 2 whole large eggs, 1 tsp vanilla extract, and 1 cup cold cubed unsalted butter. Mix gently until combined, then knead on a lightly floured surface for 8-10 minutes until smooth and elastic.
Here's the thing—don't rush the kneading. You'll know it's ready when the dough springs back slowly when poked. If it sticks to your fingers, you need a couple more minutes. Shape into a ball, place in a lightly greased bowl, cover with a damp towel, and let rise in a warm place for 1 hour or until doubled in size.
🍳 Step 2: Shape the Dough into Braids
Once the dough has risen, punch it down to release air and divide it into three equal parts. Roll each piece into a 16-inch rope, about 1-inch thick. Here's where the fun begins—lay the ropes parallel to each other and braid them tightly, just like you would hair, securing the ends with a bit of dough.
Place the braid on a parchment-lined baking sheet and cover lightly with a damp towel. Let it rise again for 30-45 minutes until puffy and almost doubled. I like to preheat my oven to 350°F during this time so it's ready when the bread is.
🔥 Step 3: Bake to Golden Perfection
Brush the risen braid with a beaten mixture of 2 whole egg yolks for that beautiful golden finish. Sprinkle generously with 0.25 cup colorful sprinkles if using—this is where the magic happens for that festive Easter look!
Bake in the preheated oven for 30-35 minutes until the bread is deeply golden and sounds hollow when tapped on the bottom. Watch closely after 25 minutes—the sprinkles will start to caramelize, giving you that perfect crunchy texture.
⏰ Step 4: Finish with Glaze and Dust
Let the bread cool on a wire rack for 10 minutes. While it's still warm, brush with 0.5 cup vanilla glaze for that extra shine. Then dust generously with 0.25 cup powdered sugar using a fine-mesh sieve for an elegant finish.
Here's my pro tip: Serve the bread warm with a cup of coffee or tea. The glaze will be slightly sticky, the layers will be tender, and those sprinkles will add just the right crunch with every bite. This bread is perfect for Easter celebrations or anytime you want to treat yourself!
Pro Tips For Making Braided Easter Egg Bread
- Measure Butter Cold: Take that unsalted butter straight from the fridge—no softening needed. I learned this the hard way after trying to cream butter and sugar at room temperature, which just made the dough sticky and hard to handle. Cold butter creates flaky layers and keeps the dough manageable while shaping.
- Proof Yeast Twice: Skip the rushed single proof and give that yeast a second check. After mixing the dough, let it rise until doubled, then punch it down and let it rise again—this guarantees it’s active and ready to braid. I used to skip this, and my loaves would collapse or taste flat.
- Chill the Dough: Pop the shaped braid in the fridge for 30 minutes before baking—yes, even if you’re eager. This prevents the butter from melting too fast, so your bread stays tall and doesn’t spread into a sad pancake. I know, I know, but trust the process.
- Brush with Egg Wash: Whisk 1 egg with 1 tablespoon water and brush it generously over the braid before baking. The sugar in the recipe will caramelize beautifully, giving that classic golden crust. I used to skip this, and my bread looked dry and dull—don’t make that mistake.
Pro cooking tips for perfect results
Yeast Activation Check
The yeast is the heart of this bread, so don't skip testing it first. Sprinkle 2.25 tsp active dry yeast into 0.75 cup warm milk (110°F) and let it sit for 5 minutes. If it doesn't foam, your yeast is dead—grab a fresh packet from King Arthur or Bob's Red Mill. I always keep an extra packet in my freezer for emergencies. 🍞
Perfect Kneading Technique
Kneading builds gluten, which gives your braid structure. Use a stand mixer with a dough hook for 5-6 minutes on medium speed, or knead by hand for 8-10 minutes until the dough is smooth and elastic. Test readiness by poking it—if it springs back slowly, it's perfect. Over-kneading makes the bread tough, so stop when it passes the "windowpane test" (stretch a piece thin enough to see light through).
Braiding Like a Pro
Divide the dough into three equal 16-inch ropes—use a kitchen scale for precision if needed. Braid them tightly from the center outward, tucking the ends under. For extra security, pinch the ends together and roll them in powdered sugar to seal. This prevents unraveling during the second rise. I like to practice on scrap dough first if I'm nervous about the shape!
Oven Temperature Control
Preheat your oven to 350°F with a baking sheet inside to ensure even heat distribution. Place your braid on the middle rack—this prevents the bottom from burning while the top stays soft. For extra browning, add a ½ cup ice cube tray to the oven during the last 5 minutes of baking. The steam creates a beautiful golden crust without drying out the bread. 🔥
Glaze Timing Trick
Brush the warm bread with vanilla glaze immediately after baking while it's still 190°F internal temperature. This creates a sticky, professional finish. For extra shine, mix 0.5 cup powdered sugar with 2 tbsp milk and ½ tsp vanilla extract. Use a pastry brush to avoid drips—this is where restaurant-quality presentation happens!
Storage Secrets
Let the bread cool completely before storing to prevent sogginess. Wrap it in plastic wrap and place in an airtight container at room temperature for 2-3 days. For longer storage, freeze the whole loaf for up to 3 months. To revive, thaw overnight at room temperature or warm for 10 minutes at 200°F to restore that bakery-fresh aroma. 💫
Nutrition facts
Frequently asked questions
Why does this braided bread look like Easter eggs?
The signature braided shape creates the egg-like swirls that give this bread its name! The three strands represent the three colors of Easter eggs (red, yellow, white), while the tight weaving mimics the natural ridges of a real egg. The decorative sprinkles on top add to the festive appearance, making it perfect for holiday tables.
Can I make this bread without a stand mixer?
This recipe works perfectly by hand. Knead the dough for 8-10 minutes on a lightly floured surface until smooth and elastic. The key is patience—press and fold the dough rather than pulling it, which helps develop gluten without overworking it. A wooden spoon works great for stretching and folding.
How do I prevent my braid from falling apart?
Proper shaping is everything! After dividing the dough into three ropes, braid them tightly from the center outward, tucking the ends under to secure the shape. For extra stability, pinch the ends together and roll them in powdered sugar before the second rise. This creates a seal that keeps the braid intact during baking. Practice makes perfect—try shaping with scrap dough first if needed!
What can I substitute if I don't have colorful sprinkles?
No sprinkles? No problem! Try these alternatives: dust with powdered sugar for a classic look, or sprinkle with coarsely chopped nuts (like pecans) for texture. For a sweet touch, use crushed candy eggs or even a pinch of cinnamon sugar mixed with a little turbinado sugar for sparkle. The key is adding something decorative to enhance the Easter theme!
Can I make this bread ahead of time?
Yes, this bread actually tastes better the next day! For best results, bake it 1 day ahead and store it at room temperature in an airtight container. The flavors meld beautifully overnight, and the texture remains soft. If you need to store longer, wrap it tightly in plastic and freeze for up to 3 months. Thaw at room temperature before serving for that fresh-baked aroma.