
Breakfast & Brunch
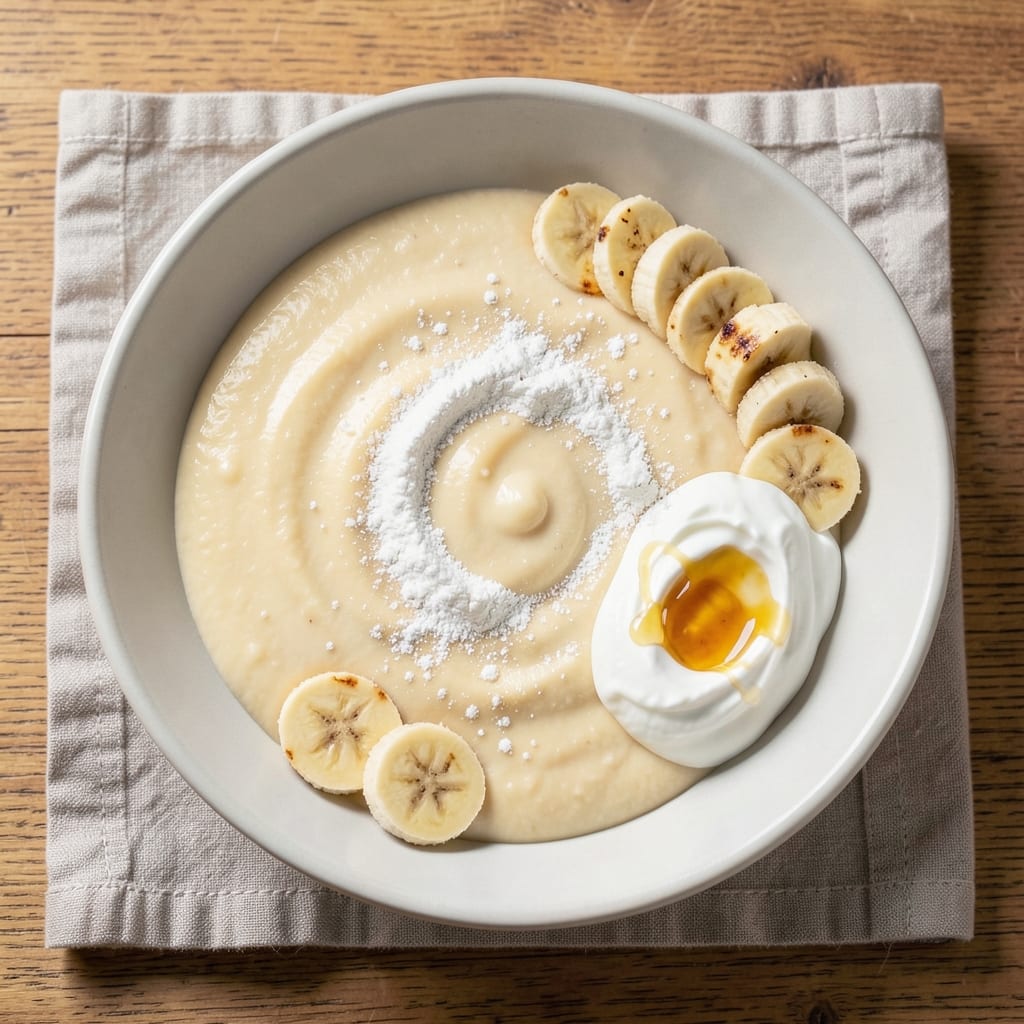
This banana yogurt egg recipe transforms simple ingredients into a fast, protein-packed breakfast that balances sweet and savory in every bite. The secret lies in combining ripe bananas with tangy yogurt and eggs—no fancy equipment needed, just a single pan for effortless cleanup. I developed this while testing quick breakfast options for busy mornings, and it’s become a staple in my rotation for its foolproof simplicity and satisfying texture.
The magic happens when you fold mashed banana and yogurt into a whisked egg mixture, then cook it in a nonstick skillet until golden and set. This method delivers crispy edges with a soft, custardy center, while the banana adds natural sweetness that pairs perfectly with the yogurt’s tang. The result is a dish that’s ready in under 15 minutes—ideal for weekdays when you need something nourishing without the fuss.
What makes this recipe stand out is its versatility: serve it as a hearty breakfast bowl, slice it into strips for a quick snack, or even wrap it in a tortilla for a handheld meal. It’s vegetarian-friendly, packed with protein from the eggs, and customizable—add nuts, seeds, or a drizzle of honey to tailor it to your taste. The combination of textures and flavors makes it impossible to resist, even for those who typically skip breakfast.
Perfect for meal preppers or anyone craving a no-fuss, nutrient-dense dish, this recipe proves you don’t need complexity to create something delicious. Let’s get cooking—your taste buds (and your morning routine) will thank you.
Ingredients for banana yogurt egg
Four eggs, one pan, and these simple ingredients create breakfast magic in minutes.
| Ingredient | Amount | Notes |
|---|---|---|
| Large Eggs 🥚 | 4 whole | Room temperature for even cooking |
| Plain Greek Yogurt 🥛 | ¾ cup | Full-fat for creaminess, unsweetened |
| Ripe Bananas 🍌 | 2 medium | Spotty skin, mashed completely |
| All-Purpose Flour 🌾 | ¼ cup | For light texture, sifted |
| Granulated Sugar 🍚 | 1 tbsp | Adjust to taste, optional |
| Vanilla Extract 🌸 | ½ tsp | Pure extract for authentic flavor |
| Salt 🧂 | ¼ tsp | Kosher or sea salt preferred |
| Unsalted Butter 🧈 | 1 tbsp | Melted for skillet coating |
| Cinnamon 🌿 | ½ tsp | Ground for warmth, optional |
| Almond Slices 🌰 | ¼ cup | Toasted for crunch, optional |
| Maple Syrup 🍁 | 1 tbsp | For drizzling, optional |
The bananas are your flavor anchor—ripe ones with brown spots pack the most natural sweetness. Trader Joe's often has perfect ones, or check your fruit bowl for those almost-too-ripe bananas you'd usually toss. The Greek yogurt should be thick and tangy—Fage or Siggi's are my go-tos, but any plain variety works. For the eggs, room temperature makes all the difference in even cooking. I always grab extra-large eggs for that perfect custardy center, but any size works if you adjust cook time slightly.
No Greek yogurt? Plain whole-milk yogurt or even sour cream works in a pinch, though texture will be slightly heavier. Short on bananas? Substitute with 0.5 cup mashed sweet potato for a savory twist. The cinnamon is totally optional but adds that cozy breakfast vibe—Penzeys has amazing whole spices if you want to toast yours fresh. For the almonds, any nut or seed works—pecans, walnuts, or even sunflower seeds if you're nut-free. And if you're watching sugar, skip the maple syrup and just enjoy the natural sweetness from the bananas.
This keeps beautifully for 3 days in the fridge, stored in an airtight container. Reheat in a skillet with a splash of milk or water until warm through—microwave works too, but it loses that crispy edge. I like to portion mine into single servings right after cooking so they're grab-and-go in the morning. Freezes for 2 months if you want to prep ahead, though texture gets slightly denser after thawing. The best part? Leftovers taste even better the next day as flavors meld.
Why You'll Love This Recipe
- No Fuss, No Mess: I swear by this recipe when I’ve got a banana that’s too ripe to eat alone. Mash it with yogurt, crack in eggs, stir in flour—no measuring cups, no fancy tools. My kitchen counter stays cleaner than my last attempt at homemade pancakes.
- Sweet-Savory Magic: That yogurt keeps it tender while the bananas add natural sweetness, but don’t worry—it’s not cloying. The eggs give it a rich, almost cake-like texture, and a sprinkle of sugar at the end? Pure satisfaction.
- Breakfast or Dessert: Honestly, I’ve served this for both. Warm slices with peanut butter are a grab-and-go breakfast, but the same batter makes a quick, no-bake dessert when baked into muffins. (Yes, even on a Tuesday night.)
- Pantry Staple Power: Between us, this recipe uses things you already own. No specialty ingredients, no last-minute grocery runs—just eggs, yogurt, and whatever bananas you’ve been ignoring. And leftovers? They reheat like a dream.
Step-by-step instructions for banana yogurt egg bites
Here's how to make these sweet-tart bites in just one pan—perfect for a quick breakfast.
Whisk Wet Ingredients for a Smooth Batter
In a medium bowl, combine the 4 whole Large Eggs, 0.75 cup Plain Greek Yogurt, 2 medium Ripe Bananas (mashed completely), 0.5 tsp Vanilla Extract, and 0.25 tsp Salt. Whisk vigorously for 2-3 minutes until the mixture is completely smooth and homogeneous. The bananas should dissolve entirely, and the batter should have a thick, custard-like consistency.
I like to use a fork first to break up any large banana chunks, then switch to a whisk for thorough mixing. This ensures no lumps remain, which would create uneven cooking later. The batter should be pale yellow with no visible streaks of banana or yogurt.
Incorporate Dry Ingredients for Structure
In a separate small bowl, sift together the 0.25 cup All-Purpose Flour and 1 tbsp Granulated Sugar. Gently fold this mixture into the wet ingredients using a silicone spatula, being careful not to overmix. The batter will thicken slightly but should remain pourable. Here's the thing—overmixing develops gluten, which can make the bites dense rather than light and fluffy.
Next, stir in the 0.5 tsp Cinnamon and set the batter aside. The cinnamon adds warmth and complements the natural sweetness of the bananas perfectly. If you're using the optional 0.25 cup Almond Slices, toast them lightly in a dry skillet over medium heat for 2-3 minutes until fragrant and golden. Set them aside for topping later.
Cook the Bites in a Buttered Pan
Heat an 8-inch oven-safe skillet over medium-low heat and melt the 1 tbsp Unsalted Butter evenly across the bottom. Pour the batter into the skillet, spreading it into 4 equal-sized rounds (about 2 inches in diameter each). The pan should be warm but not smoking—this prevents the bottoms from burning before the centers cook through.
Cook undisturbed for 4-5 minutes until the edges begin to set and the tops look slightly dry around the edges. You'll see small bubbles form on the surface—that's your signal to flip each bite carefully using a thin spatula. Cook for another 3-4 minutes on the second side until the centers are just set but still slightly tender.
Finish with Warmth and Texture
Transfer the skillet to a 350°F preheated oven for 5-7 minutes to ensure the centers are fully cooked through. The bites should be golden on top with a slightly caramelized edge. While they're baking, drizzle each bite with 1 teaspoon of Maple Syrup for a glossy finish. If you toasted the almond slices, sprinkle them evenly over the top just before serving.
Let the bites rest for 2 minutes before serving—this allows them to set slightly and makes them easier to handle. The result should be a tender, custardy interior with a lightly crisp exterior, balanced by the sweetness of the bananas and the subtle crunch of almonds. Serve warm for the best texture and flavor combination.
Pro Tips For Making Banana Yogurt Egg
- MEASURE YOGURT BY WEIGHT: I learned this the hard way—using cups for yogurt leads to uneven texture. Greek yogurt varies in thickness, so weigh it (225g for 1 cup) to guarantee the right balance of richness without making the batter too heavy. Your future self will notice the difference in fluffiness.
- MASH BANANAS UNTIL SILKY: No one likes banana chunks in their pancakes. Mash the bananas with a fork first, then press through a fine-mesh sieve to remove fibers. This keeps the batter smooth and prevents that awkward texture where you can still taste "lumpy" bits.
- LET THE BATTER REST: I used to pour straight into the pan, but resting the batter for 10 minutes makes a real difference. The flour absorbs the yogurt’s moisture better, and the eggs hold their shape longer. Skip this, and you’ll end up with pancakes that spread like pancakes should—but not the way you want them to.
- USE A LIGHT HAND WITH SUGAR: This isn’t a dessert—don’t drown it. Start with half the sugar called for, taste, then add more if needed. Too much sugar competes with the bananas’ natural sweetness and makes the eggs gummy. Trust the ripe bananas to do half the work.
Common mistakes when making this dish
Overmixing the Batter
I’ve seen this happen more times than I can count—especially when people get nervous about lumps. But overmixing the batter develops gluten in the flour, which turns your light, fluffy bites into dense, cake-like bricks. The key is to whisk just until the dry ingredients are just incorporated, about 10-12 strokes with a spatula after sifting. Stop when the batter holds its shape but still flows easily. Trust me, those tiny lumps will disappear during cooking—they’re not the enemy! 🥛
Using Cold Eggs
Cold eggs from the fridge can create uneven cooking and even cause your bites to crack or split while cooking. Always use room-temperature eggs—just let them sit out for 30 minutes before starting. Pro tip: I keep my eggs in the fridge door where they warm up faster. Cold eggs also make the batter thicker, which can lead to dry bites. A quick fix? Add 1 tablespoon of warm water to the batter if it’s too stiff.
Skipping the Resting Time
Rushing to serve these bites right out of the pan is a big mistake—they’ll be too fragile and may fall apart. Let them rest for 2 minutes before cutting or serving. This allows the proteins to fully set and the structure to firm up slightly. I’ve learned this the hard way—once, I served them immediately and had a breakfast disaster when they crumbled in my hands. Patience pays off here! 🍌
Incorrect Heat Levels
Too high heat burns the bottoms before the centers cook through, while too low heat leaves them undercooked and gummy. Aim for medium-low heat in the skillet—you should see gentle bubbling around the edges, not vigorous boiling. If your pan isn’t oven-safe, finish under the broiler for 1-2 minutes on high to get that golden top without overheating. I use an 8-inch cast iron skillet for even heat distribution, but nonstick works too if you keep an eye on it.
Uneven Portioning
If your bites come out different sizes, they’ll cook at different rates—some overdone, others undercooked. Use a small ladle or ice cream scoop to portion the batter into 2-inch rounds for consistent cooking. I like to eyeball it first, then adjust the next round if the first one looks too big or small. Uneven portions are the #1 reason I’ve seen these bites turn out disappointingly inconsistent.
Ignoring the Oven Finish
Skipping the oven step leaves the centers undercooked and rubbery. The 5-7 minutes at 350°F ensures everything cooks through evenly while adding that perfect golden crust. If your pan isn’t oven-safe, transfer the bites to a baking sheet and finish in the oven. This step is non-negotiable for food safety—you want those eggs fully cooked to 160°F internal temperature. Don’t skip it! 🔥
Nutrition facts
Frequently asked questions
Can I make this recipe without flour?
Yes! For a gluten-free version, substitute 0.25 cup all-purpose flour with 0.25 cup gluten-free 1:1 baking flour or 0.25 cup almond flour. The texture will be slightly denser but still delicious. You may need to add 1 extra egg to help bind the mixture since almond flour absorbs moisture differently.
How can I make these bites more protein-packed?
Add 0.5 cup crumbled feta cheese or 0.5 cup cottage cheese to the batter for extra protein. You can also stir in 1 scoop vanilla protein powder (about 1 tbsp) when mixing the wet ingredients. Both options keep the texture light while boosting nutrition significantly.
What's the best way to reheat leftovers?
For crispy edges, reheat in a nonstick skillet over medium heat for 2-3 minutes per side until warmed through. If using the microwave, wrap bites in a damp paper towel and heat for 20-30 seconds. The microwave method keeps them soft but loses the crispy texture. Never reheat above 165°F to maintain food safety.
Can I make this recipe ahead of time?
These bites store beautifully in an airtight container in the fridge for 3 days. For longer storage, freeze for up to 2 months—wrap individually in plastic wrap first to prevent freezer burn. Thaw overnight in the fridge before reheating. The flavors actually improve after the first day as the banana sweetness develops.
Why did my bites turn out too dry?
Overcooking is the most common cause—check your oven temperature and reduce to 325°F if needed. Another reason could be using too much flour or cooking at too high heat. For extra moisture, add 1 tbsp milk or water to the batter. The ideal texture should be tender inside with a slightly crisp exterior, not completely dry.